Showing posts with label rice. Show all posts

Monday, September 9, 2013

Chicken, Carrot, and Bok Choy Coconut Curry

This recipe came about when I wanted to use a bunch of fresh, young carrots that I picked up at the farmers’ market. It goes together quickly, uses easy-to-find ingredients, and it’s loaded with vitamins, minerals, and crunch. Depending on the chiles you use, this can be made hot or mild. Give this recipe a try when you have limited cooking time but want to create something healthy.


Chicken, Carrot, and Bok Choy Coconut Curry

1 T. coconut oil
2 chicken breasts, cut into bite-sized pieces
1 bunch young carrots, sliced into thin rounds
1-3 chiles, chopped*
2 cloves garlic, minced
1 15-oz can coconut milk
1 T. freshly grated ginger
1 T. coriander seeds, toasted and ground
1 t. cumin seeds, toasted and ground
2 t. coarsely ground black pepper
1 bunch bok choy, chopped
Sea salt to taste
Sesame oil

Heat the coconut oil over high heat in a large pan. Once it has melted, add the chicken pieces and begin to cook, stirring occasionally. When the chicken pieces are barely showing any pink, add the carrots and chiles. Keep stirring until no more pink shows in the chicken.

Next, add the coconut milk, ginger, coriander, cumin, and black pepper. Reduce heat to medium-low and cook for 8-12 minutes, stirring occasionally, until the chicken is cooked through and the carrots have lost their crunch but are still firm.

Add the bok choy. Cover and cook until the green tops are barely wilted. Add sea salt to taste and blend, then serve over cooked rice with a drizzle of sesame oil.


* You can make this as mild or as hot as you prefer. If you like it mild, use chiles such as cubanelles or poblanos; if you prefer hot, use a cayenne, Serrano, or even a habanero or scotch bonnet.


Monday, March 4, 2013

Salmon with Ginger Chutney & Blueberries

This recipe was born from Things Whole Foods Had On Sale This Week. No restaurant replica, no convoluted tale of inspiration, just a girl trying to save a few bucks on sustainable seafood and produce that wasn’t sprayed with Big Ag’s latest science fair project.


Salmon with Ginger Chutney & Blueberries

¼ c. ginger chutney
1 cup water
4 4-oz portions wild salmon fillet
1 cup organic blueberries

Cooked basmati rice, to serve
Braised Escarole, to serve (recipe below)
Nigella seeds, for garnish

Blend the ginger chutney and the water together in a shallow baking dish, whisking with a fork to remove any lumps from the chutney. Place the salmon fillets in the baking dish, skin side up, and marinate for 30 minutes up to 4 hours. 

Preheat the oven’s broiler to high. Line another large, shallow baking dish with foil and place the salmon fillets skin side up, with plenty of room between each fillet and room between the salmon and the edges of the dish. Pour the ginger chutney marinade into the dish alongside the salmon. Add the blueberries.

Broil for 4-6 minutes, or until the salmon skin starts becomes crispy and develops a slight char. Remove from heat.

Place about ½ c. cooked basmati rice in the center of a dinner plate, creating a round bed. Place braised escarole around the rice like a ring, and place one of the cooked salmon fillets, skin side down, on top of the basmati rice. Spoon some of the cooking liquid and the blueberries on top of the salmon, and sprinkle with the nigella seeds. Prepare three additional plates in the same manner and serve piping hot.


Braised Escarole

2 heads escarole, chopped
1 clove garlic, smashed with the side of a knife
1 allspice berry, smashed with the side of a knife
Pinch salt

Escarole grows best in sandy soil, so it must be thoroughly washed before using or you may end up with gritty greens. To wash the escarole, place the chopped leaves in a large bowl and cover with water. Using your hands, slosh the escarole around in the bowl for a minute or so, wiggling the leaves through your fingers so that any sand falls to the bottom of the bowl.

Place the crushed garlic clove and allspice berry in a large pot with a lid. Without draining, lift the escarole out of the water-filled bowl and place directly into the pot. Sprinkle with a pinch of salt, place the lid on the pot, and cook over medium heat, stirring occasionally, until the escarole has wilted but still retains a firm texture. Pay close attention during cooking—the water that clings to the leaves after washing isn’t always enough; the pot should never be dry, so you may need to add a tablespoon or two of extra water while cooking.

Remove the garlic clove and serve with a slotted spoon to drain away any excess moisture.

* Nutritional info: serves four. 537 calories, 11.5 g fat, 63 g carbohydrates, 32 g protein.


Monday, February 4, 2013

Chicken and Sweet Potato Curry with Tropical Fruits

This recipe was an accident—a happy accident. I’d originally purchased the tropical fruits and Thai seasonings to create what turned out to be painfully underwhelming Tropical Fruit Spring Rolls. By rethinking the ingredients and adding chicken, rice, and vitamin-packed sweet potatoes, I turned my failure into a delectable Thai-inspired curry.

While most large supermarkets sell papayas and mangos (if not fresh, you’ll probably be able to find them in jars or frozen), dragon fruits may be more difficult to track down. Try a Latino or Chinese grocer; if you still can’t find dragon fruit, simply add the diced flesh of 2-3 peeled kiwis.


Dragon Fruit, Cross-Section
Chicken and Sweet Potato Curry with Tropical Fruits

2 T. coconut oil
12 oz. chicken breast, cut into bite-sized pieces
2 medium sweet potatoes, peeled and diced
3-4 Thai chiles, minced
1 mango, peeled and cut into small dice
1 ripe papaya, seeded and cut into small dice
1 dragon fruit, peeled and cut into small dice*
8 oz. can sliced water chestnuts, drained
15 oz. can coconut milk
Juice and grated zest of 1 lime
¼ c. rum
2 T. soy sauce
2 t. cardamom, ground
1 t. grains of paradise, ground
1 t. grated ginger
½ t. ground cinnamon
¼ t. freshly ground black pepper
Handful Thai basil, chopped
Handful fresh mint, chopped

Cooked rice, to serve
Small sprigs of basil and/or mint, for garnish
Thai chiles, for garnish

In a large, heavy-bottomed pot, melt the coconut oil over medium-high heat, then add the chicken, sweet potatoes and chiles. Cook for 5-7 minutes, stirring frequently, until the chicken has mostly browned.

Next, add all remaining ingredients except the Thai basil, mint, and rice. Stir to combine, lower the heat to medium-low, cover, and cook for another 20-25 minutes, stirring occasionally.

When the dish is finished cooking, stir in the chopped Thai basil and the chopped mint. Blend well, spoon over rice in individual serving bowls, and top with a small sprig of basil or mint and a single Thai chile.

*If you cannot locate dragon fruit, substitute 2-3 peeled kiwis.

* Nutritional info: serves 6-8. 406 calories, 16 g fat, 48 g carbohydrates, 22 g protein.


* To purchase ingredients used in this recipe, click the link(s) below:


Saturday, September 22, 2012

Curry Crusted Swordfish With Vegetables and Sriracha Cream

This is the first actual meal that I cooked from scratch in my new kitchen! There’s not much to it – if you can slice, you can cook this dinner. This dish goes together in no time, and the combination of hot jalapeno, bold spices, and cool cucumber is surprisingly refreshing!


Curry Crusted Swordfish with Vegetables and Sriracha Cream

For the spice crust
Pinch kosher salt
1 t. / 5 g coriander
1 t. / 5 g cumin
1 t. / 5 g mustard seed
½ t. / 2.5 g kala jeera*
½ t. / 2.5 g turmeric powder
½ t. / 2.5 g coarsely ground black pepper

16 oz / 455 g swordfish, tuna, or other firm-fleshed fish steaks
2 roma tomatoes, chopped
1 large cucumber, quartered lengthwise and thinly sliced
2-3 jalapeno chiles, chopped

For the sriracha cream
4 T. / 60 g sour cream
1 T. / 15 g sriracha
2 t. / 5 mL mild vinegar (white wine vinegar is a good choice)
2 c. / 450 g cooked rice
 
 
toasting the spices
First, toast the salt, coriander, cumin, mustard seed, and kala jeera in a frying pan until they become fragrant, approximately 3-4 minutes. Place them in a mortar and pestle along with the turmeric and black pepper. Grind coarsely. Rub the spice mixture into the swordfish, set aside.

Preheat your broiler. Line a baking dish with foil, then add the tomato, cucumber, and jalapeno in a single layer. Place the spice-crusted swordfish on top of the veggie layer, and broil for 12-15 minutes, or until the fish is cooked through.

While the fish and vegetables are cooking, make the sriracha cream by whisking together the sour cream, sriracha, and vinegar. If the mixture seems too thick, add a few drops of water to the sauce until it is thin enough to drizzle.

Take the fish and vegetables from the oven; let rest for 3-5 minutes. In the meantime, divide the rice among four individual plates. After the fish has rested, divide the fish and vegetables into four equal portions, serve atop the cooked rice. To finish, drizzle with the sriracha cream.

* Also known as black cumin – if you cannot find kala jeera, you can order it online from Penzey’s.

Nutritional info: serves four. 317 calories, 9 g fat, 29 g carbohydrates, 25 g protein.


Sunday, July 22, 2012

Creamed Callaloo with Jerk-Seasoned Chicken

This summer, the local farmers’ harvests have been good to me. I’ve picked up early season green tomatoes, some fantastic golden raspberries, fresh garlic, rainbow carrots, and a bounty of other goodies, and to my surprise, one of the vendors was once again selling Callaloo, a green leafy vegetable that grows in tropical climates and is popular in Caribbean cooking, especially when made into a hearty stew bearing the same name (click here for my Callaloo recipe).

The actual species that gives us Callaloo leaves is the amaranth plant, a powerhouse whose seeds nutrient-packed, gluten-free seeds are cooked like grains. Back to the leaves—Callaloo leaves are full of vitamins A and C, and they taste like milder spinach.


Creamed Callaloo with Jerk-Seasoned Chicken

Callaloo leaves
1 T. / 15 mL coconut oil
1 t. / 4 g grains of paradise (also known as melegueta pepper)
1 large brown onion, sliced
1 serrano chile, minced
1 bunch callaloo leaves, chopped and rinsed
1 c. / 230 mL coconut milk
Juice of 1 lime
Salt and pepper to taste
Cooked rice, to serve
Grilled Jerk-Seasoned Chicken, to serve (recipe below)

Heat the coconut oil over medium heat in a large, heavy-bottomed pot. Add the grains of paradise, onion, and Serrano chile. Cook for about 10 minutes, stirring occasionally, until the onion becomes soft and translucent.

Add the callaloo leaves and a splash of water. Stir, then cover and reduce heat to low. Cook until the leaves have begun to wilt.

Add the coconut milk, lime juice, salt and pepper. Cook, stirring frequently, until heated through. Spoon over cooked rice and serve alongside Grilled Jerk-Seasoned Chicken


Grilled Jerk-Seasoned Chicken

20 allspice berries, ground
½ t. / 3 g grains of paradise (also known as melegueta pepper)
1 t. / 4.5 g. ground ginger
2 t. / 9 g cayenne pepper
2 t. / 9 g garlic powder
2 t. / 9 g dried thyme
2 t. / 9 g salt
Approx. 2 lbs. / 1 kg chicken breast tenders, pounded ultra-thin

Combine all ingredients except the chicken. Blend well, then rub the spice mixture into the chicken. Grill over medium heat, approximately 2 minutes per side. Serve with Creamed Callaloo.

Nutritional info: serves six.  425 calories, 14 g fat, 34.5 g carbohydrates, 39 g protein.


Tuesday, April 10, 2012

Chickpea and Rice Salad with Lime Pickle

“If you marry him, you’ll live on pickles and rice!” So goes the admonition of Indian fathers in many of the curry-flavored versions of the familiar Gatsby-esque Rich Girl/Poor Boy love story. Thanks to a Groupon for Shalimar, an Indian market in Cambridge, MA, I was able to try these famed pickles, and frankly, I don’t understand why living on pickles and rice is a bad thing!

Lime pickle is made throughout India and in other Southeast Asian countries as well. Recipes often vary from region to region - some versions use sesame oil, others use castor or peanut oil. The spice blends also vary. Once blended, the pickle mix is set aside for at least two weeks, and then it is ready to be used as a condiment or a punchy seasoning, as I’ve done in the recipe below.

If you do not have a reputable Indian grocery in your area, jars of lime pickle can be purchased online via Amazon.


Chickpea and Rice Salad with Lime Pickle

2 ears fresh corn, kernels removed
½ c. / 115g. lime pickle
2 16oz / 439g cans chickpeas, drained
1 8.5oz / 240g can Le Sueur peas, drained
1 large tomato, chopped
½ t / 2g brown mustard seeds
½ t / 2g yellow mustard seeds
½ t / 2g ground cumin
2t. / 10mL malt vinegar
3 c. steamed basmati rice
Handful chopped cilantro
Salt and pepper to taste

First, prepare the corn by microwaving the fresh corn kernels for one minute. Alternatively, heat them in a pan with a splash of water, cook them for a minute or two, then drain. Set aside.

If the lime chunks in your lime pickle are large, use a sharp knife and chop them into small bits.

Now, combine the corn, the lime pickle, and all remaining ingredients in a large bowl. Stir until blended well. Cover with plastic film and chill in the refrigerator for at least two hours. Serve cold, or serve hot with a dollop of plain yogurt or sour cream.

* Usually, I post at least one photo with my recipes.  Unfortunately, I forgot to take a picture of this one before I ate all the leftovers.  OOPS!

Nutrition information: serves 6. 488 calories, 7.7g fat, 59.6g carbohydrates, 15.3g protein

Friday, March 23, 2012

Chicken with Crunchy Veggies and Thai Flavors

This is yet another one of my recipes that wasn’t necessarily inspired, but came together when I said, “I’m hungry!” Thinking of what I could cook, I realized that I rarely cook chicken. I eat a lot of seafood, pork, beef, and vegetarian dishes, but I don’t do chicken too often. Why not? No conscious reason. I like chicken, but since starting this blog, I’ve leaned towards recipes with stronger flavors and uncommon ingredients.

When I do cook chicken, I buy organic, free-range, air-chilled chicken. Organic and free-range chicken is better for your body, the environment, and the chickens themselves. If you’ve never heard of air-chilled chicken, seek it out¾while normal chickens are dunked in an ice water bath to lower their temperature after slaughter and processing, air-chilled chickens are sent through several courses of cold air. This significantly lowers the risk of bacterial contamination (one infected chicken in an ice water bath can contaminate an entire lot), but it is also more economical - chickens given ice baths absorb water, and the consumer ends up paying for water. When chickens are air-chilled, you're not paying for anything but chicken. Air-chilled poultry costs a little more than conventional chicken, but I think it’s worth it to pay a slightly higher price for clean, unadulterated chicken.

Chicken pairs with pretty much everything, as does rice. But plain chicken and plain rice isn’t very exciting; I wanted to spice it up a bit. When you add in bold flavors, a little meat goes a long way, so if you’re looking to cut down on meat consumption, crunchy vegetables and Thai-inspired flavorings provide flavor and textural contrasts to the rather neutral chicken and jasmine rice. Even better, this recipe couldn’t be easier!


Chicken with Crunchy Veggies and Thai Flavors

1 T. coconut oil
8 oz. Boneless skinless chicken breasts, chopped into bite-sized pieces
1 lb. Green beans, cut into 1” lengths
1-2 cloves garlic, crushed
1 t. grated fresh ginger
2 T. low sodium soy sauce
2 T. fish sauce
2 T. Boston Olive Oil Company’s lemongrass & mint white balsamic vinegar
1 cucumber, seeded and chopped
1 large tomato, seeded and chopped
2 Serrano chiles, minced
2 fresno chiles or red jalapenos, minced
3 green onions, sliced into rings
Handful chiffonade-cut basil
1 T. toasted sesame oil

Coked rice, to serve
Extra basil, to garnish
A few very thin slices Serrano chile, to garnish


In a large metal pan or wok, heat the coconut oil over high heat until it becomes fluid. Add the chicken pieces and brown for 3-4 minutes, stirring constantly.

Reduce heat to medium. Add the green beans, garlic, ginger, soy sauce, fish sauce, and lemongrass & mint vinegar. Cook for 5-7 minutes, continuing to stir constantly. Next, add the cucumber, tomato, Serrano chile, and fresno chile. Continue to stir constantly, and cook for an additional 5 minutes, or until the green beans are no longer raw tasting but still retain their crunch.

Finally, add the green onions, basil, and sesame oil. Stir until blended, then spoon over cooked rice. Garnish with basil sprigs and thin slices of serrano chile. 


Tuesday, July 19, 2011

Around the World in Eighty Bites - Jamaica

Perhaps I should have saved this post for wintertime, a time when anything that can point one's thoughts in the direction of a warmer climate is greatly appreciated, but my tastebuds go where my cravings take me - I don't plan this stuff.  This week, they went to Jamaica.  Jamaican food is highly underrated in this country, which is a shame because it is creative, distinct, and perfect for the sweltering heat Boston has been getting for the past few weeks.

Jamaican culture is often parodied in mainstream American media through depictions of dreadlocked Rastafarii smoking ganja, paired with thought bubbles containing the words, "Hey, mon!" or "We jammin!" Yes, some Jamaicans smoke weed - so do some Bostonians, but we don't see cartoons of red-haired, pink-faced guys in Sox hats smoking blunts with the caption, "Yeahhhh, bro! Reefahhhh!" Ohhh, stereotypes. Behind this all-too-popular mockery is an exciting culture stemming from collective resistance to one of mankind's greatest wrongs, and out of that culture came inspired cooking.

The slave trade, that brutal scar on humanity's history, is the greatest factor in the formation of Jamaican cuisine and culture. With the slave trade came ingredients from Africa, as well as those brought to the Island by white people. Once the legal slave trade was ended, Asian-Indian labor was used in Jamaica's sugar plantations, and curries became popular on the Island, taking on a Caribbean flavor.

Prevalence of the Rastafarian image in American media does not reflect Jamaican culture as a whole. Hollywood would have us believe that Jamaican food is centered around pot brownies, which is certainly not the case. However, Rastafarians do have a dietary regimen in place - called Ital - which simply bans processed foods.  Was this an early version of the Slow Food movement? 

For this post, I cooked two traditional Jamaican dishes with ingredients common enough in the States that you should have no problem duplicating them. These recipes go from good to great when combined with rum drinks and Buju Banton!
 
Beans & Rice

1 T. coconut oil (or other vegetable oil)
1 yellow onion, chopped
1 can Goya dry pigeon peas
1 fresno chile or red jalapeno, chopped
3 cups cooked rice, seasoned with Goya Sazon
1 green bell pepper, chopped
1 t. garlic powder
1/2 t. allspice powder
2-3 green onions, sliced
salt & pepper to taste

Heat the coconut oil over medium heat in a large, heavy-bottomed pot. When it has melted, add the yellow onion. Cook for a few minutes, stirring occasionally, until the onion has softened a bit.

Next, add the pigeon peas and fresno chile. Cook for another minute or two, just until the pigeon peas are heated through. Finally, add the cooked rice, green pepper, garlic powder, allspice, green onions, and salt and pepper. Stir until well-blended, then continue stirring until it is heated through. Serve with Jerk Chicken.


Jerk Chicken

1 pound chicken breast strips, pounded thin with a meat mallet
1 batch Jerk marinade (see recipe)

Marinate the chicken strips for 1-4 hours in the jerk marinade. Cook on the grill, 2-3 minutes per side, or until cooked through. If you do not have a grill, bake in a 400-degree oven for approximately 20 minutes, turning once.


Jerk Marinade

This is my adaptation of a recipe found in Bon Appetit's July 2011 issue.

4 T. vegetable oil
1/4 cup fresh lime juice
4 green onions, chopped
4 habanero peppers, chopped*
2 garlic cloves, chopped
1 T. dried thyme (or 2 T. fresh)
1 T. grated fresh ginger
1 T. brown sugar
2 t. ground allspice
1 t. salt
1/2 t. finely ground black pepper
2 T. malt vinegar

Combine all the ingredients in a blender. Process until a consistent puree is achieved.

* If you can't take the heat of habaneros, you can wimp out and use jalapenos.

Wednesday, April 13, 2011

Project Pantry Raid 2011

Despite the fact that I'm pretty good at keeping an accurate mental inventory of my kitchen cupboards' contents, I have a bad habit of opening pantry doors and staring mindlessly at the food inside for minutes at a time, as if something I want to eat might magically appear if I stare long enough (I also do this in front of the refrigerator, letting all the cold air escape…oops).  Last week, something hit me – my pantry shelves are completely packed, yet I constantly complain that I have no food...Project Pantry Raid, Go!

Pantry Raids aren’t a new concept to me.  I’ve done them in the past, mostly in college when I had to choose between eating well/eating Kraft Dinner and using the money I didn't spend on food to pay for a night out at a trendy bar.  I’ve done Pantry Raids before moving into a new apartment, and I've done them in response to articles I’ve read about food waste (click here for a good one).  But this is the first time I’ve decided to do one simply to challenge myself! 

I decided to go forward with this challenge just before bedtime on the evening of Tuesday, April 5.  I began the challenge the very next day, and the project officially ended last night at 11:59pm.  Woohoo, time to go food shopping!  For the past two days I’ve fantasized about spending this evening meandering through Boston with my reusable bag over my shoulder, stopping into Savenor’s, Mercato del Mare, Boston Olive Oil Co., Salumeria Italiana, and Las Ventas, that wonderful little Spanish market next to Estragon on Harrison Ave.  I could stroll down Boston’s cobblestone sidewalks wearing a cute hat and carrying a navy and white striped canvas tote containing fresh bunched carrots and a baguette, maybe stop at a bar with patio seating for a glass of red wine, maybe take up smoking cigs and download Putamayo’s “French Café” album and pretend I’m in Paris…

When my brain finally landed back here on earth, I realized that most of these places will be closed by the time I leave the office, so I’ll probably end up inadvertently spending another day cooking with pantry food.  But that’s fine and dandy, because I completed my challenge - not only did I last an entire week without buying groceries; I did it without gaining or losing weight, getting sick of pasta/polenta/rice, and/or developing scurvy.  In fact, I made some really delicious dishes!  Sure, I did the tried-and-true beans & rice, spaghetti with olive oil and garlic, pasta salad with canned tuna, quinoa pilaf with herbs…but I made some standout dishes as well!  Granted, I’d purchased a large bunch of asparagus on the Tuesday I hatched this plan, but I managed to stretch those spears across several recipes.  If you want to stay true to Pantry Raid-style cooking, you can substitute canned or thawed frozen asparagus for fresh in any of the recipes below. 

Without further ado, here are the three best recipes to emerge from Project Pantry Raid 2011. 


Ronini with Crab and Asparagus

1 box rotini
1-2 T. bacon fat
½ stick butter (can use olive oil if saturated fat concerns you)
1 lb. asparagus spears, sliced
Pinch chile flakes
2 cans (4-6 oz. each) crabmeat
Handful chopped mint leaves
Salt and pepper to taste

Cook the pasta.  In the meantime, melt the bacon fat and butter in a large, heavy-bottomed saucepan large enough to accommodate all the cooked pasta.  When they have melted, add the thawed asparagus slices and chile flakes.  Cook for 5-7 minutes, stirring occasionally, until the asparagus is tender but still crunchy and completely coated with butter.  Now, add the crabmeat to the pot, stirring to break up any lumps until it is completely blended in.  Finally, add the cooked pasta to the pot, stirring until the pasta is completely coated with the butter and the crab and asparagus are mixed in well, then add the mint, salt, and pepper, giving it another good stir.  Serve hot, garnished with a sprig of fresh mint.


Grilled Asparagus with Nutmeg Brown Butter

½ lb. asparagus spears
1 t. olive oil
1/4 stick butter
1 whole nutmeg

Heat a grill pan until it is completely hot and a bead of water sizzles and evaporates instantly.  Drizzle the olive oil over the asparagus.  Roll the asparagus spears through your palms so that each spear is coated with olive oil.  Place the spears on the grill pan in one even layer, and cook for about 3-5 minutes, using tongs to turn them occasionally (depending on the size of your grill pan, you may have to work in batches).  Remove from pan and set aside on a warmed plate. 

While the asparagus is cooking, heat the butter in a small, heavy frying pan.  Heat it until it starts to froth and give off its fragrance, then use a microplane grater to grate about 1 teaspoon of nutmeg into the butter.  Stir the nutmeg into the butter, then pour over the grilled asparagus spears. 


Spicy Kedgeree

2 cups cooked rice
1 T. butter
¼ cup milk or half & half
1-2 t. curry powder (plus extra for dusting)*
Pinch chile flakes
2 T. minced canned jalapenos
1 7-oz. can smoked whitefish
2 T. dehydrated onion flakes
1 hard-cooked egg, quartered

Preheat the oven to 400.  In the meantime, place the rice, butter, milk, curry powder, and chile flakes in a saucepan over low heat.  Cook for about 10 minutes, stirring frequently, until all the ingredients are heated through and well-blended.  Add the smoked fish, stir a few times until the fish breaks into flakes and combines thoroughly with the other ingredients, then transfer this mixture to a shallow baking dish.  Sprinkle the onion flakes in an even layer on top of the rice and fish mixture, then bake for 15 minutes or until the top layer is crunchy. 

When baking is complete, you can serve it one of two ways:  1) for no-frills presentation, simply scoop the kedgeree onto a plate, top with one hard-cooked egg quarter, and sprinkle the egg with a little extra curry powder, or 2) for artistic presentation, use a silicone ring mold (you can also use double layer of waxed paper or cardstock paper) to create an oblong, egg-shaped mold (see photo).  Pack the kedgeree into the mold until it is about 2 inches high, then press the back of a spoon into the top layer to create a concave surface.  Carefully remove the ring mold so that the molded kedgeree does not topple.  Now, place one of the quartered hard-cooked eggs in the concave bed, and dust with extra curry powder. 


* To make a curry powder that works great in this recipe, combine 1 t. each ground cumin, dry mustard, and turmeric, and ¼ t. each ground ginger and ground cardamom. 


Wednesday, March 30, 2011

Ingredient Spotlight - Cactus Pads (Nopales)

Artichokes.  Asparagus.  Fresh peas.  I doubt many of my fellow New Englanders would add cactus to this list of veggies we associate with spring, but if we lived in Mexico, we might change our tune.  Cactus pads, or nopales, are grown and sold in Mexico and are at their best in the spring, but they are neither common nor easy to find in the U.S., especially the northern U.S.  This is unfortunate.  If you ever see nopales at the market, do yourself a favor and pick up a few.  Just be careful picking them up - after all, they ARE cactii, and they WILL stab you. 


Preparing nopales is a pain in the you-know-what (and the hands, if you're careless), but I'm willing to put up with a little aggravation in order to experience new tastes and textures.  I found that nopales taste like a cross between a green bean and an artichoke, with the texture of cold Chinese-style jellyfish...wait, what?  OK, I guess I could compare it to just-barely-cooked calamari...but the jellyfish comparison is far more accurate, so if you haven't tried jellyfish, get on that!  Anyway, to prepare fresh nopales, simply trim the edges and slice off the spines using a small, sharp paring knife, then slice into bite-sized pieces, boil in salted water for about 10-15 minutes, and use in recipes of your choice.  I've included two refreshing recipes below!

Nopales Salsa

1 lb. nopales, prepared as described above*
1/2 red onion, minced
1 cup canned tomatillos, drained and chopped
2 fresh serrano chiles, minced
1 t. dried oregano
juice of 1 lime
splash olive oil
handful chopped cilantro
salt and freshly ground black pepper to taste

Combine all the ingredients in a glass bowl.  Chill at least 24 hours to let the flavors blend, then serve as desired.

* If you cannot find fresh nopales, prepared nopales in a jar can be purchased online. 

Individual Rice Bowls with Nopales Salsa

1 cup cooked rice, seasoned with Goya Adobo
1/2 c. shredded grilled chicken (you can also use pork, steak, or shrimp)
1/2 c. nopales salsa
avocado slices, to serve
sour cream, to serve
lime wedges, to serve

In a shallow bowl, place the rice, chicken and nopales salsa alongside each other.  Garnish with the avocado slices, sour cream, and lime wedges.

Sunday, January 30, 2011

Taste of the Tropics Stir Fry - A Vacation For Your Tastebuds

I like snow.  I think it's pretty, I think it makes the air smell fresh, and I love making snow angels and snow sculptures.  One of my favorite things to do is walk around the city during a gentle snowfall, and I smile like a doofy kid every time I see fluffy white flakes outside my window.  But after four major snowstorms in the past 30 days and another one on deck for Wednesday, even I am a little burned out on snow.  I've found myself longing for the beach, sunshine, and fresh summer vegetables.  Since I can't bring the feeling of the Cape's sand, the scent of sunscreen, the energy of Fenway Park, or the taste of a burger or hot dog fresh off the grill to this dismal January day, I decided to transport myself to a tropical paradise - well, I transported my tastebuds at least. 

There's not much that tastes more tropical than coconuts, rum, lime juice, and shrimp.  If you could use a sensory break from the winter doldrums, stop into your grocery store and buy what you'll need for this recipe before the milk/toilet paper/batteries crowd shows up, download some Jimmy Buffett or Bob Marley, and use your snow day to whip up this virtual vacation!

Taste of the Tropics Stir Fry

For the stir-fry sauce:
1/4 cup fresh lime juice
1/2 cup spiced rum
1 T. red chile flakes
1 t. grated fresh ginger
1 t. Goya Adobo seasoning
generous grind black pepper
1 habanero pepper, quartered (optional)

1 T. coconut oil (can substitute butter or vegetable oil)
1 large shallot, minced
1 pound raw shrimp, peeled
1 jicama, diced
1 green bell pepper, chopped
1 cup fresh coconut, cut into 1/4" strips

Cooked white rice, to serve


Make the stir fry sauce.  If using the habanero, let sit for approximately 30 minutes, then remove the habanero and discard. 

In a large wok or frying pan, heat the coconut oil over medium-high heat until it melts.  Saute the shallot until it begins to soften.  Now, add the remaining ingredients.  Stir-fry until the shrimp just begin to curl and are firmed up - do not overcook.  Add the stir-fry sauce, toss several times until all the vegetables and shrimp are coated, then remove from heat and serve hot over cooked rice. 


Friday, November 12, 2010

Peruvian 101

Last night, I had the pleasure of dining on home-cooked Peruvian food.  I’ve neither cooked nor tasted Peruvian food before, and I didn’t cook it last night – I left the hard labor to the expert, my Peruvian friend who has been occupying a lot of my time lately.  Let me tell you something – having a man cook for me was delightful, and what made it more awesome is that the kid’s a great cook!

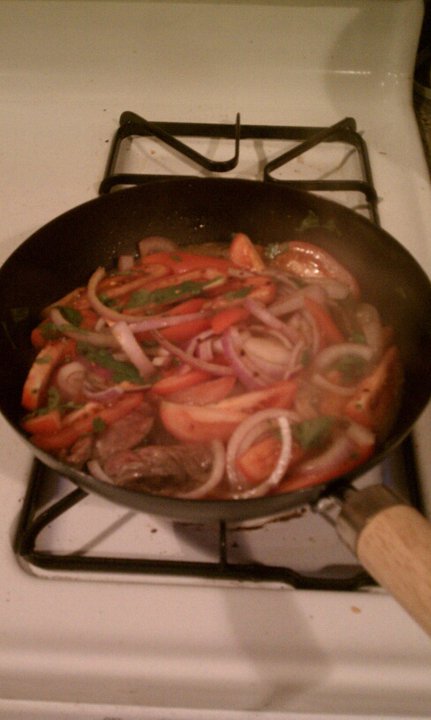
He lured me in with Lomo Saltado, a Peruvian dish consisting of sliced steak, tomatoes and onions marinated in vinegar and spices, then stir fried with a splash of soy sauce and topped with cilantro.  It is served over rice and fried potatoes, and he made a spicy Aji sauce to accompany the rice.  Holy Mary Mother of God!  This homemade hot sauce is quite possibly the best thing to ever happen to me, and I cannot wait to make my own.  I need to learn the proportions, but he told me that it’s easy to make and consists of habanero peppers, garlic, olive oil, salt and pepper.  

Letting someone else take control and do the work in the kitchen is one of the most difficult things I’ve ever done:

        “Can I help with anything?”  “No.” 
        “Can I at least do some dishes?” “No.” 
        “Really?” “Really.” 
        “Are you sure?” “Yes!” 

I literally had to go stand in the other room and watch from afar; standing in a kitchen and doing nothing felt far too odd and awkward.  I thought to myself, “This must be how goalies feel when the puck’s on the other side of the ice.”  I was fidgeting the entire time he cooked the stir fry.  I was relieved once the food was ready, because now I could do something with it, even if that something was simply shoveling it into my mouth. 

Along with our dinner, we shared a bottle of Rioja, which I tried for the first time last night.  I smelled and sipped the wine before I began eating so that the wine's flavor would be pure and would not have to compete with the flavors in the food.  My first thought?  The Rioja smelled exactly like Chianti.  I sipped; it tasted very similar to Chianti as well.  Definitely a variety I’d buy again.  Finally, it was time to taste the food. 

Each bite of Lomo Saltado was better than the last, and I wanted to savor each and every mouthful of the Aji-kissed rice.  I did – I painstakingly scooped up every last grain of rice with my fork until not one remained on my plate.  The meat was well-flavored and tender, the onions retained a slight crunch, and the tomatoes were bursting with flavor. He topped the dish with cilantro, which was the perfect foil for the spicy Aji sauce, and the Rioja was a great match for the dish as it was full-bodied enough to stand up to the bold flavors of Lomo Saltado.  When I commented that I thought the Aji sauce would be great on grilled tuna, he countered with, “It’s great on everything.”  I believe that.

This is definitely a recipe I’ll have to try on my own, but I’d be just as happy hopping in a cab and letting him wear the Chef hat!  I insist that you order this dish if you find it on a menu.  It’s a superstar!


Tuesday, November 9, 2010

Italian "Sushi"

About a week ago, I was giving serious consideration to turning life as I know it upside-down and heading to a cattle call for a chance to be included in the next crop of reality TV cooking show contestants.  After careful consideration (and careful reading of the fine print legalese on the application form),  I decided not to go after a spot on MasterChef, but I did gain something from the decisionmaking process – a new recipe. 

As part of the audition process for MasterChef, each contestant is required to bring a pre-prepared dish to the audition.  Contestants are not permitted to prep or cook any part of the dish at the audition; all work must be be done off site.  Although some leeway is allegedly given in the judging because of the fact that applicants have to wait for hours at a time, I’m sure the judges would wonder about a contestant’s judgment if he/she presented a dish that was only at its peak under specific temperature conditions.  The instructions suggested packing the prepared dish in temperature-controlled containers, such as coolers and ice packs for cold dishes and heat wraps for hot dishes, so I wanted to make something that would be OK in a cooler whose temperature regulation might crap out after six hours of waiting in queue. 

Although the show’s producers wanted contestants to present their signature dishes, my signature dish – linguine with radicchio and cream - would taste like raw sewage if not served piping hot (OK, not raw sewage – but the flavor and texture would be less than ideal).  I challenged myself to come up with something that would be OK served either slightly chilled or at room temperature.  I thought of making the Seared Sesame Tuna and Gingered Pumpkin that I cooked in “Around the World in Eighty Bites – Japan,” but my mom advised against it, her reasoning being that A) seared tuna has been done a thousand times,  and B) it is not the best example of my cooking style. 

Had I decided to audition for the show, I needed a dish that would make me stand out from the crowd and truly shine.  I was less concerned about perfect execution than I was about creativity – perfect execution can be achieved through practice, but creativity and the ability to be inspired are things that can’t be learned.  I also wanted to stay true to my culinary roots, so I was determined to cook something using Italian ingredients and/or techniques.  Something based on risotto, another one of my go-to dishes, seemed like a good starting point.  That’s when it hit me – Italian “sushi!”

My plan was to wrap cold risotto around a filling of sliced roma tomato, then roll each “log” through a layer of very finely chopped fresh basil.  Each roll would be sliced into small cylinders, much like maki rolls, and they would even look like maki sushi – green basil exterior, white risotto base, and the red tomato in the middle would resemble the filling in a tuna or salmon maki roll.  I’d make plain risotto with only a few teaspoons of grated parmesan – no other additions – so that the flavors from the risotto would not overwhelm the other ingredients.  I conducted my experiment last night, and it worked beautifully. 

I made the risotto using Japanese short-grain sushi rice, not because I thought it would work better, but because yours truly didn’t check her pantry before creating a shopping list.  I assumed I had risotto rice…you know what they say about assuming.  Risotto made using sushi rice tastes just like the real thing, but I’ll have to try this recipe again using real risotto rice to assess the texture and determine which rice is more suitable for this recipe.   Also, I made the first roll using only minced basil for the exterior, but I discovered that combining the basil with a few flakes of kosher salt helped the basil better adhere to the rice.  Be sure to use wax paper to make the rolls – the rice will stick to foil or plastic wrap. 

Try this recipe if you’re feeling creative – the result is a delicious cold dish perfect for an antipasto course! 

Italian "Sushi"

3 cups cold plain risotto
1 or 2 firm roma tomatoes, peeled and sliced lengthwise into thin strips
1 bunch fresh basil, very finely minced
Kosher salt flakes


Place about 1/3 cup of the risotto on a sheet of wax paper 4-5 inches wide.  Using the curved back of a large spoon, press the risotto into a rectangle approximately 2.5” X 6” and about 1/3” thick.


In the center of the risotto rectangle, place two of the tomato strips lengthwise. 


Bring the ends of the paper up and together so that the long edges of the risotto rectangle touch, then roll the remaining edges of the wax paper between your thumbs and index fingers so that the rice comes together around the tomato strips and a long cylinder is formed (as shown in photo, left). 


Spread the basil and a pinch of kosher salt in a thin, even layer on a cutting board.  Bring the risotto roll, still wrapped in wax paper, to the edge of the cutting board, then unroll it and guide the risotto roll onto the basil layer, rolling it through the basil so that the minced leaves cling to the rice. 

Once you have rolled the risotto through the basil, place the risotto roll on a clean surface and slice it crosswise into 1-inch cylinders.  Place them cut-side-down on a platter. 

Repeat these instructions until all of the risotto is used, then serve with Garlic and Caper Dipping Sauce, and eat using chopsticks. 

VARIATION:  To make an entire spread of Italian “Sushi” rolls, vary the fillings, the exterior herbs, and the dipping sauces.  For fillings, try strips of roasted red or yellow bell pepper, smoked mozzarella, thinly sliced prosciutto or mortadella, anchovies, preserved lemon peel, or marinated portabella mushrooms.  For the exterior herbs, try minced oregano, parsley, mint, arugula, or tender young chicory leaves.  For dipping sauces, try balsamic vinaigrette or bagna cauda, a hot dip based on butter, olive oil, and anchovy.


Garlic and Caper Dipping Sauce

¼ cup olive oil
2 T. dry white wine
1 T. grated pecorino romano
1 T. finely minced salt-packed capers (do not rinse salt)
1 garlic clove, finely minced

Combine all ingredients in a small bowl.  Whisk well with a fork or small whisk, let stand for at least 15 minutes, whisk again, and serve with Italian “Sushi.” 


Sunday, September 19, 2010

Oh, Snapper!

Farewell, fish-free food.  I have enjoyed my vegetarian and vegan recipes, but I've also craved seafood.  Yesterday, I trekked to the North End to pick up a half-dozen oysters and a slice of salmon from Mercato del Mare.  It felt great to be back!  Another customer was in the store inquiring about snapper, and I instantly erased the salmon from my mind and started building a list of ingredients to go with a nice, fresh piece of snapper. 

First ingredient?  Capers.  I have always used bottled capers in brine; I decided that today was the day I'd try capers packed in salt, which are said to have more flavor and a better texture.  I purchased a tub at Salumeria Italiana, and discovered that the rumors are true.  Salt-packed capers aren't much more expensive than capers in brine.  They should be rinsed before use (unless you're using them in a sauce where salt is called for - then use as is and omit extra salt), but this is not time consuming.  If you can find them, use them. 

The other ingredients I planned to use are things I already had at home, like parsley and oranges, so I decided to head back to the apartment.  That's when I walked by a small gelato shop - this place was tiny; if I had been walking with a purpose I may not have even noticed it...I literally stopped dead in my tracks, walked backwards a few steps, and realized that yes, I had in fact seen gelato.  I felt like Chunk when his rant about his frustration with the other Goonies was cut short by his discovery of the Fratelli's ice cream freezer.  I wish I knew the name of the place where I purchased my gelato - I'll get it next time.  If you can't wait, it's on the corner of Hanover and Cross Street right next to the Citizens ATM.  To my delight, they'll put two different flavors in the same cup, which saved me from having to decide between hazelnut and pistachio.  Each flavor was delightfully rich.  The pistachio contained tiny chunks of real pistachios, while the hazelnut was more generous with the nuts - hazelnut halves swam about and added a pleasant crunchy surprise!  I did not care that it was too cold out to be eating gelato, I sat down on a park bench, people watched, and savored every spoonful.  Note to self - don't hold a paper cup in your bare hand on a cold day, grab more napkins next time and insulate! 

Today, I made the snapper, along with a batch of seasoned rice.  This meal was unbelievably satisfying, and the zesty citrus and the clean, fresh flavor of the parsley led my tastebuds to believe summer was still alive and kicking.  Sometime this winter, when it's been blustery and gray for weeks on end, I will make this recipe to remind myself of warmer days.

Broiled Snapper with Citrus-Parsley Pesto

1/2 cup finely minced flat-leaf parsley
zest of 2 oranges
1.5 T. salt-packed capers, chopped (do not rinse)
2 T. olive oil
1/4 t. coarsely ground black pepper
1/4 t. crushed red pepper flakes
2 snapper fillets, skin removed

Combine all ingredients except the fish in a small bowl, mix well to form consistent paste, and set aside for at least 30 minutes for flavors to blend.

Prepare the broiler on high heat.  Place each slice of fish in the center of a square of aluminum foil.  Spread each slice generously with the pesto, then fold up the edges of the foil to form a package. 

Broil for 15 minutes.  During the last two minutes of cooking, open up the package so that the pesto is exposed to the heat.  Let it start to brown a little, but do not let it burn.  Remove from oven and let sit for 3-5 minutes.  Serve with seasoned rice. 


Seasoned Rice

2 cups freshly cooked rice
1 T. Goya Adobo with Bitter Orange seasoning
1 T. olive oil

Combine the Goya seasoning and the olive oil with the cooked rice.  Fluff and serve.