Showing posts with label wine. Show all posts

Sunday, November 24, 2013

Beef Stew with Bacon & Vegetables

I’ve known for a few days that it was going to be cold today. And by cold, I don’t mean “Waaahhh, a coat ruins this outfit,” I mean “I am legitimately concerned for my extremities.”

As much as I complain about the cold, I can’t help but love the excuse to spend a day next to the stove. Yesterday, when the weather wasn’t so frostbitey, I planned in advance and bought the ingredients I needed to make a lovely slow-cooked beef stew.

This recipe makes a lot—and by “a lot,” I mean “Hey, East Coast, I’ve got enough for all of you!” Nah, just kidding—but this recipe definitely yields enough for 8-10 cold, hungry people! And it has plenty of healthy vegetables, which I think makes up for the fact that bacon fat is the key to the best flavor.


Beef Stew with Bacon & Vegetables

4-5 slices of thick-cut streaky bacon, sliced into ½” pieces
1.5 lbs. chuck steak, cut into bite-sized pieces
1 large onion, diced
3 leafy stalks celery, diced, leaves set aside
3-4 carrots, diced
3 juicy tomatoes, diced
2-3 c. dry red wine
1 32-oz. box organic low-sodium beef broth*
1-2 turnips, diced
3-4 red potatoes, diced
1 large bunch kale, ribs removed, leaves torn into pieces
1 t. dried thyme (or half the amount fresh)
1 t. crumbled dried sage leaves (or 3 fresh leaves, minced)
½ t. ground ginger
½ t. garlic powder
1 lb. green beans, sliced into 1-inch lengths
Smoked sea salt, to taste
Cracked black pepper, to taste


Before you even start chopping, make sure you have a huge pot (I used my 6.75 quart Le Creuset risotto pot). Otherwise, you’re screwed.

Just before adding the liquid
Once your pot is ready, add the bacon over medium heat and cook it until the fat is melted away and the meaty bits are cooked but not burnt. Then, add the beef chunks and cook, stirring frequently, for about 5 minutes until the beef chunks are mostly browned. Then, add the onion, carrots, and celery stalk (make sure to keep the leaves separate and set them aside—they will be added later). Cook for about 5 more minutes, stirring frequently, until the onion has softened a bit.

Next, add the tomatoes (I added a few yellow cherry tomatoes, as you can see in the photo) and 1 cup of the wine. Turn the heat to high, and cook until the wine has reduced and most of the liquid has evaporated.

Now, add one more cup of wine and the beef broth, the turnips, potatoes, and kale, and the thyme, sage, ginger, and garlic. Reduce heat to medium-low and cover. Cook for 30 minutes, stirring occasionally.

Once the kale is completely wilted, add the green beans. If it seems dry, add the remaining wine (if you don’t need to add it, you should probably drink it). Cook for about 5 minutes until the green beans are cooked, then add the smoked sea salt and the cracked pepper. Give it a few good stirs until it is well-blended, then serve piping hot. This dish will stick to your bones!


* If you use pre-made beef broth, make sure to use low-sodium, and preferably organic. Of course, if you have your own beef broth, even better!

Not the prettiest, but it's wicked good!

Monday, November 11, 2013

Linguine with Seafood and Citrus

I swear I’m not going to get emotional…I swear I’m not. Not gonna do it! Why am I getting all sentimental? Because I haven’t been inspired to write for a long time. But this weekend, I got the chance to hang out with some amazing friends, some old and some new, and throughout the day when the conversation turned to food, I began to miss cooking for the purposes of sharing recipes.

I don’t often get to share the actual dishes I create—but I can always share my recipes, and I love sharing food with others, even if it’s just through typed words on a page. It’s time to get back to what I love. So here goes. I don’t know how often I’ll get to post, I don’t know if anyone will read my recipes, and I don’t know if anyone will try to cook them…but I get to do what I love—cook, write, and share. Mangia, bitches!


Linguine with Seafood and Citrus

16 oz. linguine
2 oz. butter (1/2 a standard stick)
3-4 cloves garlic, pressed
1 bulb fennel, sliced
2 T. capers
1 t. dried oregano
½ t. crushed chile flakes
Rind and juice of 1 large lemon
Rind and juice of 1 orange
½ c. dry white wine
1 lb. calamari, tubes sliced into rings*
½ lb. large scallops, sliced into bite-sized pieces**
2 cups roughly chopped parsley
2 large handfuls arugula
Salt and pepper to taste
Splash extra virgin olive oil

Cook the linguine in heavily salted water. In the meantime, melt the butter in a large pot over medium heat. Add the garlic, being careful not to let it burn. When the garlic starts to become fragrant, add the fennel, capers, oregano, chile flakes, and lemon and orange rind (save the juice for the next step). Stir gently, stirring every few minutes, until the fennel slices have softened but are still firm.


Timing is important for these next few steps – when the pasta is about 2-3 minutes away from being cooked, add the lemon and orange juice and the wine to the pot with the fennel and seasonings. Turn the heat to high, and stir until the mixture is bubbling.  Add the calamari and the scallops, and cook for about a minute, stirring constantly. Add the parsley and arugula to the pot, stirring just until it is blended in.  Add the salt and pepper to taste.

Immediately after adding the parsley and arugula, drain the pasta and add the cooked pasta to the pot. Add a splash of olive oil, then toss to coat the pasta. Serve piping hot preferably with wine.


* If tentacles give you the willies you can use all tubes, but tentacles add texture and make for a more interesting presentation.

** Always use “dry” scallops—the texture and flavor are superior. They’re more expensive, but you get what you pay for, and you won’t be ingesting a chemistry project.


Sunday, January 27, 2013

Cold-Weather Cooking: Farfalle with Chicken, Mushrooms, and Roasted Red Peppers

When temperatures drop down to single digits, it’s only natural to be inclined to cook hearty dishes with rich, buttery sauces! This recipe, which uses dark meat chicken, roasted red peppers, meaty Portobello mushrooms, and fiber-packed chickpeas, is simple to prepare and immensely satisfying. Bundle up, head to the market and pick up these easy-to-find ingredients, and once you've thawed out, put this on the stove. Serve with lots of Chardonnay!


Farfalle with Chicken, Mushrooms, and Roasted Red Peppers

16 oz. / 455 g. dry farfalle
Splash olive oil
4 boneless, skinless chicken thighs
1-2 large shallots, sliced
1 head garlic, roasted*
4-5 large Portobello mushrooms, diced
2-3 large red peppers, roasted and minced*
1 15-oz.can chickpeas (do not drain)
2 bay leaves
3 whole cloves
Pinch dried rosemary
½ c. Chardonnay
½ c. light cream
Pat butter
Salt and pepper, to taste
Cayenne pepper, to taste (optional)


Cook the pasta in heavily salted water. In the meantime, heat the olive oil over medium-high heat in a large, heavy-bottomed pot. Add the chicken and brown for a few minutes, then add the shallot and garlic and continue to cook for another 3-5 minutes.

Next, add the mushrooms, red peppers, chickpeas, bay leaves, cloves, rosemary, and wine. Cook for 15-20 minutes, stirring occasionally.

When the chicken is fully cooked, add the cream, butter, salt and pepper, and cayenne (if using). Blend well, then add the cooked pasta. Mix well, and serve piping hot.

*Note: For instructions on roasting garlic and peppers, click here. When selecting peppers for roasting, choose peppers that are long rather than round and boxy. I don’t know why, but they seem to yield a more flavorful roasted pepper!

* Nutritional info: serves six. 624 calories, 16 g fat, 75 g carbohydrates, 47 g protein.


Saturday, November 17, 2012

Trout in Red Wine with Chiles, Cocoa, and Hazelnuts

If you have a fisherman in the family, surely you’re familiar with cooking trout in lemon butter or simply grilling them over a campfire. In Northern Italy, where trout is plentiful, it is often cooked red wine with lemon, cloves, parsley and dill. In France, Trout Amandine, a preparation featuring lots of butter and toasted almonds, is king. In Mexico, fresh trout are grilled with chiles, garlic, and lemon or lime juice.

Unable to decide which of these three traditional preparations I wanted to use on some fresh rainbow trout I scored at Mercato del Mare, I decided not to make a decision, but to whip together a recipe combining all three recipes. Cooked in red wine, topped with toasted hazelnuts, and simmered with chiles, garlic, and a bit of unsweetened cocoa, which adds depth to this dish just as it does in traditional Mexican molĂ© sauce, you get to experience the best of three very different trout dishes!


Trout in Red Wine with Chiles, Cocoa, and Hazelnuts

For the trout:
2 whole trout, cleaned
1 clove garlic, minced
1 cup / 235 mL red wine vinegar

For the sauce:
2 slices streaky bacon, chopped
1 tablespoon / 15 g butter
1 large shallot, minced
2 cloves garlic, minced
1-2 dried chiles, crushed
2 bay leaves
A few sprigs fresh thyme
1 cup / 235 mL dry red wine, such as Chianti or Montepulciano d’Abruzzo
Juice and rind of 1 lemon
1 teaspoon / 5 g unsweetened cocoa powder*

To serve:
Handful minced flat-leaf parsley
¼ cup / 60 g toasted hazelnuts
2 tablespoons / 30 g. minced pea shoots
Salt
Freshly ground black pepper
Hazelnut oil*


First, place the trout in a glass or ceramic dish. Pour in the wine and minced garlic, shake, and set aside to marinate for a half hour.

While the trout is marinating, prepare the sauce. Using a heavy-bottomed pot large enough to fit both trout, heat the butter over medium-high heat, then add the bacon. Cook for 3-5 minutes or until the bacon begins to crisp, then add the shallot, garlic, and chiles and continue to cook until the shallot begins to soften. Add the bay leaves, thyme, red wine, lemon juice and rind, and cocoa powder. Cook for 8-10 minutes, stirring frequently to loosen up any browned bits of bacon at the bottom of the pot.

While the wine sauce is cooking, remove the trout from the vinegar and discard the vinegar and garlic. Place the trout in the pot with the wine sauce, shake the pan a bit to distribute the sauce over the trout, then reduce heat to medium-low and cook, covered, for 15-20 minutes, or until the trout flakes easily.

While the trout is cooking, combine the parsley, hazelnuts, pea shoots, salt and pepper in a small bowl.

To serve, use a fish spatula to transfer each trout to a warmed plate. Sprinkle the inside of each trout with the parsley/hazelnut/pea shoot mixture, and sprinkle on top as well. Drizzle each trout with hazelnut oil, and serve piping hot alongside roasted potatoes.

* To purchase ingredients used in this recipe, click the link(s) below:

Scharffen Berger Cocoa Powder (Google Affiliate Ad)

La Tourangelle Roasted Hazelnut Oil (Google Affiliate Ad)

Nutritional information: serves two. 711 calories, 25 g fat, 10 g carbohydrates, 45 g protein.


Saturday, September 29, 2012

Butternut Squash Risotto, Cinnamon Spiced Chicken

“I could go crazy on a night like tonight, when summer’s beginning to give up her fight.” So goes the lyrics to my favorite Indigo Girls song. But as much as I love the beach, grilled food, and rooftop bars, I don’t go crazy when summer fades away. The shift in seasons means a shift in cooking. The beers we drink get a little darker and a little heavier. Oysters start to taste a bit crisper. Fresh beans and tomatoes give way to apples, squashes, and grapes, and the cooler temperatures mean more time that I get to spend indoors, particularly in my kitchen, where I love experimenting with autumn’s bounty.

Two recipes that showcase some of my favorite fall flavors are Butternut Squash Risotto and Cinnamon Spiced Chicken. These are perfect dishes to cook on that first fall day that’s chilly enough to make you wear a jacket!


Butternut Squash Risotto

4 cups chicken broth
2 T. butter
1 medium butternut squash, cut into cubes
1-2 shallots, minced
1 cup Arborio rice
1 cup dry white wine
1 t. nutmeg*
¼ t. cayenne pepper
1 T. olive oil
1 ½ c. grated pecorino romano
Handful chopped parsley
Salt and pepper to taste

Heat the chicken broth in a small saucepan. Keep the broth simmering on low while you complete the remaining steps.

In a large, heavy bottomed pot, melt the butter over medium heat. Add the butternut squash cubes and the shallot. Cook, stirring frequently, for 5-7 minutes, or until the shallot has softened.

Add the Arborio rice. Stir until each grain of rice is coated with the melted butter. Reduce heat to low and add the wine, nutmeg, and cayenne pepper. Stir constantly until all of the wine is absorbed.

Add 1 cup of the chicken broth. Again, stir constantly until the liquid is absorbed. Repeat this step, adding more chicken broth, until the rice is fully cooked through but not mushy.

Once the rice is cooked, add the olive oil, pecorino romano, parsley, salt and pepper. Stir until the cheese has melted.

Serve piping hot, alongside Cinnamon Spiced Chicken.


Nutritional information: serves four. 300 calories, 14 g fat, 36 g carbohydrates, 7 g protein.


Autumn Spiced Chicken

½ t. cayenne pepper
1 t. ground cinnamon
2 t. dried thyme
2 t. nutmeg*
Pinch salt
Pinch freshly ground black pepper
1 lb. chicken breast tenders, pounded thin

First, preheat the oven to 400. Next, combine everything but the chicken in a small bowl. Blend well, then rub the spice blend into the chicken until the chicken is fully coated.

Place the spice-coated chicken strips on a wire rack over a baking sheet. Place the chicken in the oven and bake for 6-8 minutes, then remove from the oven and allow to rest for 3-5 minutes. Serve alongside piping hot Butternut Squash Risotto.

Nutritional information: serves four. 124  calories, 1 g fat, 0 g carbohydrates, 31 g protein.


* You can use ground nutmeg in these recipes, but that stuff is practically flavorless – you’ll get a much brighter flavor if you buy whole nutmegs and grate them with a microplane grater just before use. To purchase a microplane grater, click the link below:

Soft-Handle Microplane Zester Grater, Green, 12" (Google Affiliate Ad)


Wednesday, January 18, 2012

Ingredient Spotlight - Chanterelle Mushrooms

This is yet another one of those occurrences in which I never intended to create a blog-worthy recipe but ended up doing so. It all started with a basketful of chanterelle mushrooms on display at Whole Foods. Being a mushroom lover and never having cooked chanterelles, I picked one up, placed it in a produce bag, tossed it in my basket, and drifted over to the jicamas and peppers…and then I inched my way back to the chanterelles, putting another large mushroom in the bag. And another. With a shoplifter’s quick hand and shifty eyes scanning the periphery, I loaded up an entire produce bag as if I was trying to get away with wrongdoing. I guess I felt kind of guilty about taking most of the Chanterelles and depriving my fellow shoppers.

Fresh chanterelle
Other wild mushrooms such as morels, black trumpets, and truffles may garner all the accolades, but chanterelles are stars in their own right. When I took the first bite, I was overwhelmed, in a good way. The flavor was not what I expected, and the texture was absolutely delightful. Tasting a chanterelle for the first time was only comparable to meeting that one special person who cements in your mind the reason why it never worked out with any of your past loves and lovers and erases any doubts you had about whether or not you made the right call in holding out for something more congruent.

It’s no surprise that the flavor of a food that grows on the floors of coniferous forests amongst damp and decomposing plant debris would be characterized as “woodsy” or “earthy,” but I cannot think of a better description. The flavor is delicate; chanterelles are neither pungent nor musty. Unlike a porcini or a truffle, a chanterelle would not overpower other flavors in a recipe. When sautĂ©ed, chanterelles have a texture similar to slightly past its prime lemon meringue pie filling - delicate, but still firm.

Chanterelles cooking
When I cooked these, I planned on simply sautĂ©ing the chanterelles in a ton of butter with some sliced garlic. About two minutes into the cooking process, I splashed a bit of the Pouilly-Fuisse in my wine glass into the pan with the mushrooms, adding a bit more moisture and flavor to the mix. While stirring with one hand and using the other to peruse the ‘net for info on chanterelles via iPhone, I decided to add a few crushed juniper berries to the mix so that the flavor would be reminiscent of the pine forests in which the mushrooms grow. I didn’t stop at juniper berries. All these flavors needed a piquant boost; I achieved this by adding an ever-slight dash of finely ground white pepper, then I added a splash of light cream to fuse the whole dish together. This was definitely not what I had in mind as I was hoarding chanterelles at Whole Foods like a crack fiend, but it turned into a cohesive dish with flavor combinations that seemed like a big “DUH” after the fact. I am not exaggerating when I say that my eyes rolled back in my head with pleasure when I took the first bite. This is one of the best side dishes I’ve ever created. Hell, this is one of the best recipes I’ve created, period. I’m very proud of this one.

As an aside, the entire time that I was eating my ego-inflating chanterelle creation, I couldn’t stop thinking about roast chicken. This dish would pair extremely well with a very subtly seasoned roast chicken. Try this recipe if you can get your hands on fresh chanterelles! 


Chanterelles with Juniper Cream Sauce

2 T. butter
2-3 cloves garlic, sliced
1 lb. Fresh chanterelle mushrooms, sliced
Splash Pouilly-Fuisse, Chardonnay, or other oaked white wine
1/8 t. finely ground white pepper
4-6 juniper berries, crushed with the back of a spoon*
2 T. light cream
Pinch sea salt
Mild paprika, to garnish**

Melt the butter in a large saucepan over medium-low heat. Add the garlic and sautĂ© for a 2-3 minutes, or until the garlic has turned slightly golden. Add the mushrooms, wine, white pepper, and juniper berries. SautĂ©, stirring gently but frequently, for approximately 10 minutes, or until the mushrooms are no longer firm. Add the cream and sea salt; sautĂ© for a minute or two longer. Serve on individual plates, and garnish with a dash of mild paprika. 

* If you cannot locate juniper berries, simply add a teaspoon or two of gin, or purchase them online. 

** If you have a jar of paprika that has lost its flavor, don’t throw it away - use it as a colorful yet flavorless garnish.


Monday, January 16, 2012

Cavatappi with Roasted Cherry Tomato Sauce

Great tomatoes in January, in Boston. If you're a serious foodie, that sentence probably just made you raise your eyebrows and question my credibility; as well you should have. However, I've been buying these tomatoes for quite some time, and I've never been disappointed in them, even in January.

Grown locally by Backyard Farms, these tomatoes are packed with flavor and rival some tomatoes I've had in August. I probably go through at least one box of their cocktail tomatoes per week, if not two or three. The other day, I got the idea to roast them and make a garlicky tomato sauce, and the idea evolved into this quick, easy, and delicious pasta recipe. Try this one the next time you're able to find good tomatoes!
 

Cavatappi with Roasted Cherry Tomato Sauce


1/2 lb. cavatappi, or other textured short pasta
8 cherry tomatoes, quartered
1/4 c. butter
1 c. dry white wine
1/3 c. tomato paste
1 c. grated pecorino romano
3-4 garlic cloves, minced
generous amount coarsely ground black pepper
salt (if necessary)
handful fresh basil leaves, chiffonade-cut*
additional basil leaves, for garnish

Cook the pasta in heavily salted water. In the meantime, preheat the oven's broiler. Arrange the cherry tomatoes on a foil-lined baking sheet with one cut side down (as shown in picture above). Broil the tomatoes for 7-10 minutes, or until the tomatoes' skins have begun to blister and blacken. Remove from oven and set aside.

chiffonade-cut basil
While the pasta cooks and the tomatoes broil, combine the butter, wine, and tomato paste in a large, heavy-bottomed pot over medium-high heat. Whisk vigorously until the tomato paste has completely broken down and blended with the wine and the butter has melted. Turn heat down to low and add the pecorino, garlic, and pepper (you probably won't need salt; pecorino is a salty cheese. Taste for seasonings and only add salt if absolutely necessary). Continue to whisk until the pecorino has completely melted. Once the pasta is cooked, drain it and add it to the sauce along with the roasted tomatoes and the chiffonade-cut basil leaves. Stir a few times until all the pasta is coated, then serve hot, garnished with fresh basil leaves.
 
* Chiffonade-cut is a technique often used on fresh herbs. To cut basil, stack the leaves on top of each other, roll up lengthwise, and cut into 1/8" strips. By placing the largest leaf on the bottom of the stack, the smaller leaves will be contained in the roll and the leaves will be easier to slice.

Sunday, November 20, 2011

Bacon, Butter, Booze, and...Babies?!?

Yup, you read that right. I took a few days off from cooking and writing in order to visit the newest leaves on my family tree - my cousin's beautiful twin boys.

Once I figured out that you can't
hold a baby like a sack of flour...
It's incredible - caring for babies uses a skill set that I just don't have.  Well, maybe that's not true - swaddling is very similar to filling a burrito - but those little dudes aren't impressed by a perfectly seared scallop or a flawlessly executed filet mignon.  They just want boobs and dry diapers!  So I learned how to hold the babies, change diapers, and I even made them smile by singing a few Sinatra songs!  I can't wait until they're a bit older - I'm looking forward to experimenting with baby food, cookies shaped like puppies and dinosaurs, and other kid-friendly favorites. 

Despite the fact that I spent more time in the nursery than I did in the kitchen this week, I did create something new - a great sauce for a pork tenderloin that my aunt cooked on the grill.  The sauce was based on butter, beer, and HP Sauce, a bottled condiment popular in the UK.  My family and I first discovered HP Sauce at Buffalo, NY's annual Scottish festival - most of the food vendors kept bottles of HP Sauce at their stalls, and the condiment carts were fully stocked with pumps of HP Sauce and little paper cups, much like how we serve ketchup and mustard with burgers and hot dogs.  Once we tried this stuff, we began putting it on everything - and I mean everything.  "The fries are really good with this HP Sauce, I'm gonna put it on the fish."  "Its good on the fish, I wonder what else we can put it on?"  "Do you think the McEwan's would taste good with HP Sauce in it?" "Can I just get a bowl of HP and a spoon?"  OK, I'm exaggerating, but the stuff is pretty darn good. 

In addition to the wonderful food we ate at home, I also filled up on a few Buffalo specialties - a chicken finger sub from Jim's Steak Out, tacos from Mighty Taco, Flying Bison's Blizzard Bock, Beef on Weck (a/k/a hot roast beef on kimmelweck, a roll topped with flake salt and caraway seeds), Labatt Blue from the tap, and of course, chicken wings.  Buffalo may not have the greatest reputation, but I dare you to go there and leave hungry and unsatisfied.  It will not happen. 

Once my plane touched down in Boston, I was glad to be back home among the city lights and the sounds of the urban jungle I call home, but I missed my cousin, my aunt & uncle, and the little guys.  I needed to get back into the kitchen to distract myself, so I made a great grown-up dish:  wine-poached pears with gorgonzola and chestnut honey.  My roommate recently bought a bottle of sweet shiraz and didn't like the flavor, so instead of letting it go to waste, I decided to use it in a recipe.  The pungent flavor of the gorgonzola and the bittersweet chestnut honey really complement the sweetness of the fruit! 


HP & Beer Butter Sauce

1/2 stick butter
a few raw onion rings
1/4 c. HP Sauce
1/2 c. full-bodied beer
1 t. cornstarch
1 T. cold water
dusting of cinnamon
a few generous grinds black pepper
salt to taste

Melt the butter in a saucepan over medium heat.  Once it is completely melted, add the onion.  Saute until the butter begins to foam and become fragrant.  Remove the onion rings.  Add the HP sauce and the beer, then whisk until completely blended.  Lower the heat to simmer.

In a small bowl, whisk the cornstarch and the cold water together.  Add to the sauce, whisking quickly and constantly, until the sauce begins to thicken a bit.  Add the slightest dusting of cinnamon, a few grinds of black pepper, and salt, if necessary.  Serve over grilled pork. 


Wine-Poached Pears with Gorgonzola and Chestnut Honey

1 bottle red wine
5 whole cloves
1/2 t. anise seeds, crushed*
1/2 t. cardamom seeds, crushed*
1/2 t. fennel seeds, crushed*
4 ripe pears, peeled
1-2 t. sugar (optional)
slices of gorgonzola cheese
chestnut honey

Combine everything but the pears in a saucepan large enough to hold the wine and the pears.  Bring to a rapid boil.  Add the pears, then reduce heat to low, cover, and simmer for 20-25 minutes.

Once the pears have simmered, remove them with a slotted spoon and set aside.  Turn the heat up to high, bring to a boil (uncovered), and boil until the sauce is reduced by about half.  Taste the sauce - you may want to add a pinch of sugar, but this is not necessary. 

Remove the sauce from heat, then return the pears to the sauce.  Let cool to room temperature.  Once the pears have cooled, slice the pears lengthwise.  Arrange on a plate, alternating with slices of gorgonzola cheese.  Drizzle the cheese with a few drops of chestnut honey. 


* To crush the seeds, give them a quick grind with a mortar & pestle, or simply use two spoons to squish them. 

** The leftover poaching wine would be a great dip for biscotti or another semi-sweet cookie.

Tuesday, February 15, 2011

Chicken with French Herbs and Almonds - An Accidental Recipe

Like Sir Alexander Fleming with his magical mold, I made an accidental discovery.  I wasn't trying to create a new recipe, I was trying to make chicken piccata.  As fate would have it, my perfect storm of brain farts resulted in me having to improvise on the fly and create an entirely new recipe in the short time it takes to cook chicken cutlets. 

So how did I manage to screw up chicken piccata?  1)  I forgot to buy lemons or lemon juice, and I only had about 1/4 cup left in my trusty bottle, and 2) I forgot to dredge the cutlets in seasoned flour.  I completely forgot an entire step.  I didn't realize I'd forgotten this step until the cutlets were in the pan browning.  "Oops!" I shouted.  Ok, maybe I shouted a synonym for "oops" that begins with F.  Doesn't really matter; I just knew I had to do something to salvage the chicken.  I had about 3 minutes to either re-work this recipe and knock it out of the park, or I'd ruin it and have to pack my knives and go.  Go where?  To grubhub.com, to the pub down the street, to the cabinet containing a 6-pack of Top Ramen...

Sure, I probably don't need to treat every recipe I make like a do-or-die moment, especially considering that 4 out of 5 times I'm cooking for one, but I love a good challenge.  I refused to resign myself to cooking something not worthy of sharing with my readers.  So how did I save the chicken?  A splash of vino, a healthy injection of butter, some seasonings (including lavender flowers and green peppercorns), the final added touch of a few toasted almonds, and voila!  A brand new original recipe. 

The light, delicate flavors of this dish make it perfect for a romantic dinner for two on one of the first warm days of spring - those days will be here before you know it!   

Chicken with French Herbs and Almonds

For the marinade:
1/2 cup dry white wine
splash lemon juice
1-2 cloves garlic, pressed

2 lbs. chicken breast tenders, pounded thin with the textured side of a meat mallet
splash olive oil
1 cup dry white wine
1/4 cup lemon juice
2 T. butter
1 T. capers in brine, drained and rinsed
2 t. green peppercorns, crushed with the flat edge of a knife
2 t. dried lavender flowers*
2 t. dried tarragon
salt and pepper to taste

cooked spaghetti or angel-hair pasta
chopped toasted almonds, for garnish
tarragon sprigs, for garnish
fresh sprigs lavender, for garnish

Combine the marinade ingredients in a shallow glass or ceramic baking dish large enough to hold all the chicken pieces in one layer.  Let marinate for about a half hour. 

Remove the chicken pieces from the marinade and discard leftover marinade.  Heat a splash of olive oil in a large, heavy-bottomed frying pan with a lid over medium heat.  Add the chicken pieces, cook for 1-2 minutes on each side until the chicken pieces are no longer pink on the outside.  Remove the chicken and set aside. 

Add all remaining ingredients except the pasta and garnishes to the pan.  Heat through until the butter melts, stirring contstantly.  Once the butter is melted, add the chicken pieces again, cover with a lid, and simmer for 3-5 minutes, or until the chicken is cooked through and no longer pink inside. 

Arrange 2-3 of the chicken pieces over a bed of pasta.  Spoon some of the sauce overtop of the pieces, then sprinkle with chopped toasted almonds and garnish with tarragon and lavender sprigs.  Serve with a delicate white wine. 


* Be sure to use lavender flowers that are designed for tea, preferably organic.  Lavender used for potpourri can be treated with chemicals not fit for consumption. 


Wednesday, February 2, 2011

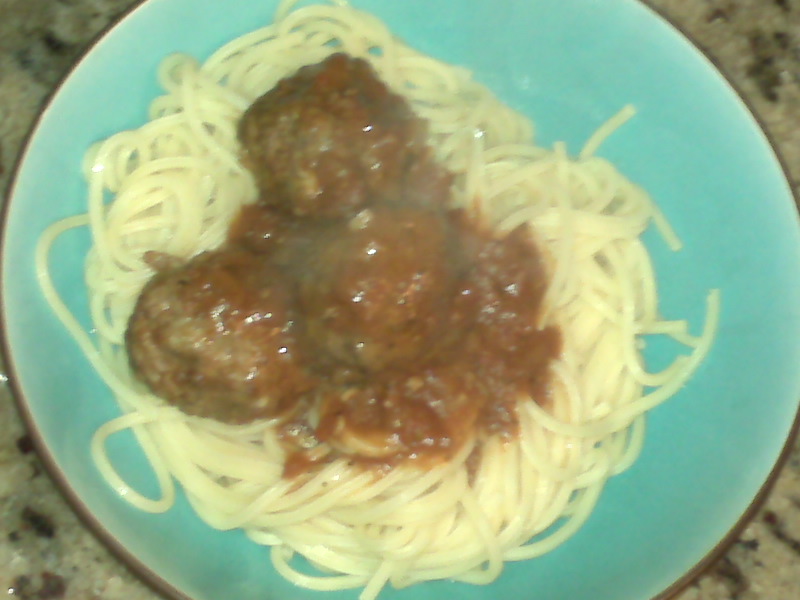
Extreme Makeover: Meatball Edition

Norma Jean Baker to Marilyn Monroe. Steve Urkel to Stefan Urkell. Television shows such as "What Not To Wear" and "The Biggest Loser." It seems Americans can't get enough when it comes to transformations, reinventions, and the like. We love rags to riches stories and before and after photos. This is why I decided to take classic spaghetti & meatballs and give it a makeover. A little wine, a little spice, and ta-da! A sophisticated version of a perennial favorite.


Next time you decide to make spaghetti & meatballs, try this version - you won't be disappointed!
 

Garlic Meatballs in Chianti Sauce

For the Sauce:
generous splash olive oil
2 cloves garlic, minced
1 onion, minced
1 28-oz can crushed tomatoes
1 cup Chianti
1 T. fennel seeds
2 t. dried oregano
1 t. dried basil
1/2 t. crushed red pepper flakes
generous grind black pepper
salt to taste

For the Meatballs:
3/4 lb. 80/20 ground beef*
3/4 lb. ground pork
2 eggs
1 cup Italian-style breadcrumbs
1/2 c. very finely minced onion
1/4 c. Chianti
splash olive oil
2-3 large cloves garlic, pressed or very finely minced
2 t. fennel seeds
1 t. dried oregano
1 t. salt
1/4 - 1/2 t. crushed red pepper flakes
generous grind black pepper
1-2 T. bacon fat**
hot cooked, buttered spaghetti
grated pecorino

First, make the sauce. In a large, heavy bottomed pot, heat the olive oil over medium heat. Add the onion and garlic and saute for 2-3 minutes, stirring occasionally, until they become soft. Do not let the garlic burn. Next, add all the remaining ingredients. Cook, stirring occasionally, until the sauce begins to gently bubble. Cover, reduce to very low heat, and let the sauce simmer while you make the meatballs.


In a large bowl, combine all meatball ingredients except the bacon fat. Using your hands, mix until the mixture is consistent. Now, using your hands, form the mixture into golf ball sized balls. Do not pack them too tightly, just enough so that they stay together.


When the meatballs are all formed, heat a large frying pan (preferably cast-iron) over high heat. One your pan is hot, add a pat of bacon fat and let it coat the pan. Working in batches, add a few meatballs at a time to the pan and brown for 2-4 minutes, or until a nice brown crust has formed on the outside of each meatball and no pink remains. Add the meatballs to the pot containing the Chianti sauce.


Once all the meatballs are added to the sauce, pick up the pot and gently shake the pot until all the meatballs are immersed into the sauce. Shaking the pot instead of stirring with a spoon reduces the chances of your meatballs falling apart. Once the meatballs are immersed, cover the pot and simmer for 30 minutes. Spoon a few meatballs and sauce over piping hot buttered spaghetti, sprinkle with pecorino cheese, and serve with a glass of Chianti.

* Please don't desecrate my recipe by using a leaner blend of ground beef; you'll lose too much flavor.


** Always save the fat when you've cooked and drained bacon. It adds great flavor to recipes, and by saving it in a sealed container in the fridge, you save yourself a step when you want to add that flavor to a recipe!


Thursday, January 20, 2011

Around the World in Eighty Bites - Poland

If you ask people on the street what their favorite Polish foods are, most will say kielbasa and pierogies.  After all, spicy smoked sausage is pretty good, and so are those little dumplings that seem to be the blond-haired, blue-eyed love child of gnocchi and ravioli.  But there's far more to Polish cooking than kielbasa and pierogies.  Game meats, both freshwater and saltwater fish, hearty grains, and winter vegetables are featured in many Polish recipes, and a little flour, butter, and sugar can make magic with Poland's local fruits and berries. 

Poland shares borders with Germany and Russia, and these two influences can be seen in the frequent use of cabbage, beets, and buckwheat.  But Poland also received a Italian influence in the 16th century when a Polish king married an Italian queen, who brought with her a team of Italian chefs.  Porcini mushrooms, garlic, wine and leeks began cementing their places in the Polish kitchen, and they are still popular ingredients today. 

As a tribute to my readers in Poland, I steered clear of kielbasa and pierogies and decided instead to make Duck with Red Cabbage, a traditional dish that hasn't yet become synonymous with kuchnia polska here in the States.  Unfortunately, my grocery store was completely sold out of duck.  Normally I would have hopped from store to store in search of fresh duck, and I normally would not compromise the integrity of a recipe, but all bets are off during massive ice storms!  I substituted chicken thighs - not the same, but still delicious.

To accompany my Chicken and Red Cabbage, I made a batch of fluffy Potato Dumplings seasoned with garlic and smoked sea salt.  Just before serving, I tossed these in a skillet with some bacon drippings and butter.  Try these recipes for yourself if you want to experience a little taste of Poland on your palate!

Chicken with Red Cabbage

1 T. butter
2 oz. bacon or pancetta, chopped
1 onion, thinly sliced
4-6 skinless, boneless chicken thighs
1 head red cabbage, shredded
1 cup dry red wine
1 T. caraway seeds
salt and pepper to taste

Melt the butter over medium-high heat in a large, heavy-bottomed pot.  Add the bacon and cook for several minutes, or until it starts to crisp.  Next, add the onion and cook for about a minute more, stirring occasionally. 

Now, add the chicken.  Brown on both sides, then add the cabbage, red wine, and caraway seeds.  Reduce the heat to a simmer, cover, and cook for 25-30 minutes, or until chicken is fully cooked and the cabbage has softened up a bit.  Season to taste with salt and pepper, and serve with potato dumplings. 


Potato Dumplings

2 pounds potatoes, peeled
1 egg, beaten
1 T. smoked sea slat
1 T. garlic powder
1/4 cup flour, plus more for dusting

1 T. bacon drippings
1 T. butter

Cook 1 pound of the potatoes in boiling water until tender.  Mash, set aside to cool.  Grate the other pound of potatoes using the large holes of a box grater.  Squeeze any excess moisture from the grated raw potato.  In a large bowl, combine the mashed potato, grated potato, egg, salt, garlic, and 1/4 cup flour.  Mix well. 


Using your hands, form the potato mix into loosely packed balls the size of golf balls.  Working in batches, drop several at a time into salted boiling water and cook for approximately 5 minutes, or until they begin to float to the survace.  Remove with a slotted spoon, set aside on a plate. 

Once the dumplings are all cooked, melt the bacon drippings and butter in a large frying pan.  Add the dumplings and toss for a minute or so to coat.  Serve hot with Chicken and Red Cabbage.

Wednesday, December 1, 2010

Update - Italian Dessert Wine

As promised in my last post, I will share some info on the fabulous dessert wine my mom and I shared over Thanksgiving break.  The producer is Piandibugnano, and the wine was a 2006 Aleatico from Tuscany. 

I purchased this bottle at The Wine Bottega; if you cannot find it, it is available online through Wine Searcher.  Cheers!

Friday, November 19, 2010

$80 wine + $8 pitchers = One Happy Blogger!

Last night was one of the most perfect Thursdays of my life.  Accompanied by a foodie friend, I attended a Barolo tasting, followed by dinner at small pizza joint in the neighborhood.  Not a glamorous evening, but neither of us could have been more pleased.  Great food and wine, topped off with a slight chill in the air and a clear sky offering great views of the city and all its lights, and I was in heaven! 

First, we attended The Wine Bottega’s Barolo Abbondanza, where we tasted 13 wines (only 4 of which I could afford to buy on a regular basis), and two liquers,  including Cardamaro, an Italian cordial distilled from cardoons and infused into wine.  Can’t even put my finger on the flavors, but it tastes like winter.  It also tastes like it should be splashed into a dirty gin martini.  My friend suggested pairing it with something containing rosemary or tarragon – tarragon seemed like a great choice, as it would complement the spiciness of the liqueur.  A splash of Cardamaro in a spicy ginger beer would also be a tasty treat. 

Onto the wine – I’ve never had the pleasure of tasting Barolo before, not for lack of interest, but lack of funds – it’s one of Italy's pricier varieties.  As explained at the tasting, the Nebbiolo grape is difficult to grow and it doesn’t adapt well to the winemaking process.  I’m certainly glad those Piemontese showed some persistence!  The wine is very rich, spicy, and fragrant – I jotted down some notes on the pamphlet the store distributes listing the featured wines, and at first, the most notable scents I picked up in were cinnamon and eucalyptus, until I noticed that one of the older bottles – 2003 Brovia Barolo “Villero” – gave off an aroma that I could not immediately identify, but I later figured out – brand-new ballet shoes.  Shoes?!?  Yes, shoes – ballet shoes, to be exact.  Ballet shoes are made from the softest of soft leather, and they hug your feet and accentuate your arches.  The leather clings so tightly to your toes that your instructor will take notice when you aren’t pointing your feet to their full capability.  Barolo has a hint of that kind of leather, not Payless leather.  Barolo and ballerinas actually do have a lot in common – after all, a good ballerina has to possess an unimaginable amount of strength and go through years of rigorous training in order to move so fluidly on two toes that each step looks effortless, almost as if she is floating.  Making such a smooth wine from a difficult grape doesn’t seem so different. 

We left the tasting happy, impressed, inspired, but empty-handed.  The shop was crowded and we were both very hungry, so we moved on to the next spot – a small pizza joint called “Ernesto’s” that received many favorable reviews on Yelp.  We cut across Prince Street and made our way over to Salem Street, glancing at each doorway trying to find 69 Salem.  I knew the general vicinity, but we still had to search.  I wondered if it had closed?  We walked a little further until finally, we saw a small sign over a narrow doorway – we found it! 

The entire restaurant (if you can really call it a restaurant, it’s more of a take-out joint with tables) isn’t much bigger than my computer screen, but that is fine by me.  We weren’t looking for a great scene; we came for pizza, beer, and each other’s company.  Don't go to Ernesto’s for ambiance.  Don't go if you’re looking for extensive beer and wine selections.  Don't go if you're looking for gourmet, wood-fired pizzas made from 100% organic semolina dough and topped with house-made mozzarella di bufala and special DOGC pepperoni imported from the northwest corner of Italy's Emilia-Romagna region made from beef and pork sourced from a producer who only feeds his animals champagne and sustainably-produced caviar. Go to Ernesto’s when you want bright lights, a perfectly greasy slice or two, and pitchers of cheap beer.  Ernesto's is my 2nd favorite discovery, second only to single-malt scotch.

Ernesto's meat lovers' pizza is phenomenal - loaded with pepperoni, sausage, ground beef, and plenty of cheese.  Add some hot pepper flakes, and you're good to go.  Only thing that could have made it better would be crumbled bacon, but it was still pretty mind-blowing, especially when washed down with Budweiser (what is it about pizza and cheap beer that is just so fantastic?!?).  Whatever my friend had was equally delicious – tomatoes, ranch, plenty of gooey cheese, and I don't remember what else.  I'm making it my mission in life to try each variety that they offer.  A slice is a quarter pie.  They have a few bottled beers, but keep it real and go with a pitcher of Budweiser, for which they'll give you plastic cups.  Not plastic pint glasses, disposable plastic cups.  Sheer perfection!  The photos and artwork on the walls sparked a great discussion regarding Godfather I vs. II, the merits of the book, and what a waste of film III turned out to be ("III?  I'd use it as a coaster!" he said).  I am head-over-heels in love with Ernesto's, and I may have to stop in again this weekend. 

So there you have it – my idea of an absolutely perfect weeknight, centered around great drink, great food, great friends, and a great city neighborhood.  Cheers! 

Tuesday, November 9, 2010

Italian "Sushi"

About a week ago, I was giving serious consideration to turning life as I know it upside-down and heading to a cattle call for a chance to be included in the next crop of reality TV cooking show contestants.  After careful consideration (and careful reading of the fine print legalese on the application form),  I decided not to go after a spot on MasterChef, but I did gain something from the decisionmaking process – a new recipe. 

As part of the audition process for MasterChef, each contestant is required to bring a pre-prepared dish to the audition.  Contestants are not permitted to prep or cook any part of the dish at the audition; all work must be be done off site.  Although some leeway is allegedly given in the judging because of the fact that applicants have to wait for hours at a time, I’m sure the judges would wonder about a contestant’s judgment if he/she presented a dish that was only at its peak under specific temperature conditions.  The instructions suggested packing the prepared dish in temperature-controlled containers, such as coolers and ice packs for cold dishes and heat wraps for hot dishes, so I wanted to make something that would be OK in a cooler whose temperature regulation might crap out after six hours of waiting in queue. 

Although the show’s producers wanted contestants to present their signature dishes, my signature dish – linguine with radicchio and cream - would taste like raw sewage if not served piping hot (OK, not raw sewage – but the flavor and texture would be less than ideal).  I challenged myself to come up with something that would be OK served either slightly chilled or at room temperature.  I thought of making the Seared Sesame Tuna and Gingered Pumpkin that I cooked in “Around the World in Eighty Bites – Japan,” but my mom advised against it, her reasoning being that A) seared tuna has been done a thousand times,  and B) it is not the best example of my cooking style. 

Had I decided to audition for the show, I needed a dish that would make me stand out from the crowd and truly shine.  I was less concerned about perfect execution than I was about creativity – perfect execution can be achieved through practice, but creativity and the ability to be inspired are things that can’t be learned.  I also wanted to stay true to my culinary roots, so I was determined to cook something using Italian ingredients and/or techniques.  Something based on risotto, another one of my go-to dishes, seemed like a good starting point.  That’s when it hit me – Italian “sushi!”

My plan was to wrap cold risotto around a filling of sliced roma tomato, then roll each “log” through a layer of very finely chopped fresh basil.  Each roll would be sliced into small cylinders, much like maki rolls, and they would even look like maki sushi – green basil exterior, white risotto base, and the red tomato in the middle would resemble the filling in a tuna or salmon maki roll.  I’d make plain risotto with only a few teaspoons of grated parmesan – no other additions – so that the flavors from the risotto would not overwhelm the other ingredients.  I conducted my experiment last night, and it worked beautifully. 

I made the risotto using Japanese short-grain sushi rice, not because I thought it would work better, but because yours truly didn’t check her pantry before creating a shopping list.  I assumed I had risotto rice…you know what they say about assuming.  Risotto made using sushi rice tastes just like the real thing, but I’ll have to try this recipe again using real risotto rice to assess the texture and determine which rice is more suitable for this recipe.   Also, I made the first roll using only minced basil for the exterior, but I discovered that combining the basil with a few flakes of kosher salt helped the basil better adhere to the rice.  Be sure to use wax paper to make the rolls – the rice will stick to foil or plastic wrap. 

Try this recipe if you’re feeling creative – the result is a delicious cold dish perfect for an antipasto course! 

Italian "Sushi"

3 cups cold plain risotto
1 or 2 firm roma tomatoes, peeled and sliced lengthwise into thin strips
1 bunch fresh basil, very finely minced
Kosher salt flakes


Place about 1/3 cup of the risotto on a sheet of wax paper 4-5 inches wide.  Using the curved back of a large spoon, press the risotto into a rectangle approximately 2.5” X 6” and about 1/3” thick.


In the center of the risotto rectangle, place two of the tomato strips lengthwise. 


Bring the ends of the paper up and together so that the long edges of the risotto rectangle touch, then roll the remaining edges of the wax paper between your thumbs and index fingers so that the rice comes together around the tomato strips and a long cylinder is formed (as shown in photo, left). 


Spread the basil and a pinch of kosher salt in a thin, even layer on a cutting board.  Bring the risotto roll, still wrapped in wax paper, to the edge of the cutting board, then unroll it and guide the risotto roll onto the basil layer, rolling it through the basil so that the minced leaves cling to the rice. 

Once you have rolled the risotto through the basil, place the risotto roll on a clean surface and slice it crosswise into 1-inch cylinders.  Place them cut-side-down on a platter. 

Repeat these instructions until all of the risotto is used, then serve with Garlic and Caper Dipping Sauce, and eat using chopsticks. 

VARIATION:  To make an entire spread of Italian “Sushi” rolls, vary the fillings, the exterior herbs, and the dipping sauces.  For fillings, try strips of roasted red or yellow bell pepper, smoked mozzarella, thinly sliced prosciutto or mortadella, anchovies, preserved lemon peel, or marinated portabella mushrooms.  For the exterior herbs, try minced oregano, parsley, mint, arugula, or tender young chicory leaves.  For dipping sauces, try balsamic vinaigrette or bagna cauda, a hot dip based on butter, olive oil, and anchovy.


Garlic and Caper Dipping Sauce

¼ cup olive oil
2 T. dry white wine
1 T. grated pecorino romano
1 T. finely minced salt-packed capers (do not rinse salt)
1 garlic clove, finely minced

Combine all ingredients in a small bowl.  Whisk well with a fork or small whisk, let stand for at least 15 minutes, whisk again, and serve with Italian “Sushi.” 


Friday, November 5, 2010

Wine 101

Last night, I attended The Wine Bottega’s "Wine 101" lesson, which I mentioned in “Tales from the Tasting” (October 15).  I could not have been more pleased with this event, and I highly recommend it to anyone in the greater Boston area who wants to learn the basics of tasting and describing wine.  Held the first Thursday of every month, the two-hour lesson is only $10.  This is not a “sit down, look forward, be quiet, and raise your hand” kind of lesson; it is an informal discussion with lots of laughter.  LOTS of laughter!  

As a writer, the worst affliction possible is a loss of words.  That’s what happens to me when I sample a new wine – the only thing I can manage to articulate is whether or not I like it, along with one or two entry-level adjectives, such as “red” or “Italian” or “sparkling.”  Putting on the Captain Obvious hat is not exactly the best way to make my readers want to try what’s in my glass.   

The class began with a sampling of a few different liquids that exhibit the flavor profiles expressed in wines – acid, sugar, tannin, and alcohol.  Then, we learned several of the characteristics typically used to review and evaluate wine, such as color, viscosity, scents, and – duh – flavor.  We sampled three whites and three reds, and the wines we tasted were very diverse – from very sweet, very dry, very fresh and acidic, and very “oh my God I need to buy that!”  Kerri, the shop's owner, provided an assortment of breads, crackers, and cheeses, and encouraged us to sample while we sipped and get a feel for how certain foods bring out flavors in wine and vice versa.  Rather than telling us what we “should” smell or taste in each wine, we were encouraged to use our own senses and come up with our own terms to describe the scents and flavors we found in our glasses.  Some were typical, similar to the ones seen in wine magazines – peaches, cherries, berries – but some were quite interesting – pleasant descriptors, such as Christmas, rosemary, and leather, and some out-in-left-field ones such as mothballs, antique store, and – my favorite – “clean port-a-potty.”  The best part?  None of these answers are incorrect!  If beauty is in the eye of the beholder, wine is in the nose and tastebuds. 

As I predicted in “Tales from the Tasting,” the Italian reds are still my favorite – but now I know why!  I prefer medium- to full-bodied wines, I’m not a fan of sweet wines, and I adore tannic wines.  Turns out, tannins and fats are a perfect pairing.  No shock that I'd like something that pairs well with bacon and butter!  As for whites?  I like some of the acidic, crisp whites, but my white wine soul mates are “orange” wines, which are darker in color, more tannic, and have more body than many other whites as a result of the grape skins being left in the wine for a longer time.    

So there you have it – if I try a wine, I can now describe it, and you can decide for yourself if it’s something you’d like to pour.  I highly recommend Wine 101 (or, for those outside of Boston, something similar) for anyone who loves the vino but lacks the vocabulary to explain why they love it!