Showing posts with label Savenor's. Show all posts

Wednesday, April 25, 2012

Ingredient Spotlight - Fava Beans; Recipe - Fresh Fava Beans with Tomato and Pecorino


from Popscreen.com
Can anyone in the US hear the word “favas” without thinking of Hannibal Lecter and his nice Chee-antee? (It’s one of my favorite movies, but I still curse it for launching 100,000 mispronunciations of my favorite wine!) Outside of mentions in movie references, favas are not often featured in American cuisine. The Italians, however, have been spinning up great fava bean dishes for centuries, and the June issue of La Cucina Italiana features an entire spread of recipes starring these beans.

Tonight, I spotted a basket of fresh fava pods in Savenor’s market, so I added a few handfuls to my bag. Originally, I was going to bring them home and set them aside until I procured the ingredients necessary to make one of La Cucina’s recipes, but instead, I chose to use them immediately and make one of my tried-and-true springtime favorites - favas with tomato and pecorino.

If you come across fresh fava bean pods during your next trip to the market, be sure to try this recipe. It takes some time, but the fresh, clean flavors make it worth the effort.


Fresh Fava Beans with Tomato and Pecorino

4 lb. / 1.75 kilo favas in pods (about 4 c. when shelled)
4 medium sized fresh tomatoes, seeded and cut into small dice
4 T / 60 g pecorino romano, chopped or coarsely grated
1 large clove garlic, crushed with the flat edge of a knife
5 T / 75 mL top-quality olive oil
Freshly ground black pepper
1 t. / 15 g smoked sea salt

First, you must prepare the favas. This step can be done ahead of time. Some people like to boil the pods whole and then shell them, but I prefer to peel the pods open and pop the individual beans out - it takes a little longer, but if you’re cooking with others, this is a great shared task to do over a glass of wine and some great conversation. Or, if you’re cooking alone, pop on your hands-free headset and call someone you haven’t talked to in a while, or do it while you’re watching your favorite TV show.

Once the favas are out of the pods, boil them for 1-2 minutes in boiling water. Once they’ve cooked for about 2 minutes and they’ve swelled a bit, drain them immediately and rinse in cold water. Now, you’re ready to slip the beans out of their skins - simply pierce the skins with your thumbnail and squeeze; the bean should pop right out. Once the skin is removed from all the beans, you’re ready to prepare the salad.

Combine the shelled and peeled favas with the tomatoes, pecorino, garlic, and olive oil. Gently stir to combine. Refrigerate for about an hour, checking at 10-15 minute intervals to gently toss.

Once the salad has chilled for at least an hour, remove the garlic clove, and add the smoked salt and a generous sprinkling of freshly ground black pepper. Stir to combine, and serve in individual bowls with a crisp Italian white wine.


Nutritional info: 4 servings. Per serving - 505 calories, 22 g fat, 34.6 g carbohydrates, 24.2 g protein


Tuesday, November 22, 2011

The Tale of Pita Rabbit

Really, I've got to give myself a pat on the back for the clever title. 

In retrospect, I should have thrown together a cute little side salad of lettuces, French beans, radishes, and parsley - the things that naughty little Peter Rabbit munched on in Mr. MacGregor's garden - but instead, I simply had these rich, delicious pita sandwiches with a glass of slightly chilled Chardonnay.  Mr. MacGregor, you can keep your lettuces - but if you catch any mischievous rabbits, I'll help Mrs. MacGregor turn them into a delicious treat!

So what made me decide to put rabbit in a pita pocket?  Top Chef!  Rabbit was the ingredient assigned to all the contestants, and as they scrambled to create their dishes, I thought about a creative dish I could make with rabbit, which was difficult, because although I've eaten rabbit, I've never cooked it.  This, ladies and gentlemen, presented a challenge that I gladly accepted.  I decided that I would learn to cook rabbit, and I'd make something creative.  Maybe the composition of the dish was not creative, but I liked the idea of a unique theme - Pita Rabbit, which sounds like a Bostonian speaking the words "Peter Rabbit."  Drumroll, please...

Rabbit isn't one of those things you're likely to find at the mega-mart, so unless you know a hunter (as not many of us city folk do), you have to seek it out at butcher shops or by mail order.  I called several of my tried-and-true butcher shops, and Savenor's was the only one that had any fresh rabbit on hand.  I know that many of the butcher shops in Boston sell rabbit, especially Boston's North End, but not everyone has rabbit in stock at all times, so I'm glad I decided to call in advance.  After all, rabbit isn't a popular meat. 

I took the advice of the butcher at Savenor's, who cautioned me about the presence of tiny pinbones and recommenced cooking the meat "slow and low," which means cooking something for a long time at a low temperature.  I cooked the rabbit with a sauteed shallot in wine, chicken, and lemongrass mint vinegar for about four hours, then I let it cool overnight. 

The next day, I shredded the cooked rabbit meat with my fingers and served it in warmed pitas with traditional Greek/Mediterranean accompaniments.  These sandwiches are packed full of healthy ingredients, yet extremely rich and satisfying.  If you're squeamish about cooking rabbit, feel free to make these with dark meat chicken, but the flavor will not be the same.  The recipe below will fill two whole pita pockets, or four halves.  When all the ingredients are prepared in advance, these make a super-quick, super-easy meal! 


Braised Rabbit

1 T. butter
1 shallot, minced
1/2 - 1 lb. rabbit parts
1/2 c. white wine
1/2 c. chicken broth
splash lemongrass & mint vinegar or juice of 1/2 lemon
pinch each salt and pepper

In a large, heavy bottomed pot, melt the butter over medium-high heat, then add the shallot.  Saute for 3-4 minutes, or until the shallot has softened.  Add the rabbit parts and brown for 5-7 minutes.

Add the wine, chicken broth, vinegar.  Reduce heat to low and cover.  Simmer for at least two hours, longer if possible, checking every 30 minutes or so.  If the liquid is evaporating too quickly, go ahead and add an extra splash of wine throughout the process. 

Once the rabbit has simmered for at least two hours, remove from heat.  Serve as-is or let cool if you're using the meat for Pita Rabbit sandwiches.


Pita Rabbit

2 pita breads, warmed in the oven and cut in half
shredded rabbit or chicken (dark meat)
minced red onion
grated cucumber
chopped mint
seeded & chopped tomato
chopped kalamata olives
crumbled feta cheese
Greek dressing (recipe below)

Fill each pita bread half with your choice of the ingredients listed above. 


Greek Dressing

1 T. plain yogurt
1 large or 2 small garlic cloves, pressed
1 T. chopped fresh mint
1 T. fresh oregano (or 1 t. dried)
1/4 t. ground sumac berries* (optional)
pinch salt
freshly ground black pepper
1/2 c. olive oil
juice of 1 lemon
1/2 t. toasted sesame oil

Whisk the ingredients in a small bowl.  Use to dress pita sandwiches or salads.  Also delicious on steamed veggies, fresh chopped tomatoes, cold pasta or rice, etc.


* Sumac is a tart spice commonly used in Middle Eastern and Mediterranean cooking.  If you can't find it at your local market, you can order it from Penzey's.

Monday, September 5, 2011

Ingredient Spotlight - Concord Grapes

Concord grapes.  Their unmistakable aroma caught me by surprise as I scanned a produce market with my mom.  I picked up the container of grapes, breathed in their scent, and put them in my basket.  "What are you going to do with those?" my mom asked.

"No idea," I replied.  "Smell them?" 

Just one sniff of Concord grapes always manages to transport me right back to my childhood in Erie, Pennsylvania.  For those unfamiliar with the dot on the map where I spent the first 18 years of my life, Erie is home to more than decaying industry, lake effect snow, and the infamous pizza bomber.  Seated on the shore of the shallowest Great Lake, Erie has miles of sandy beaches and truly gorgeous sunsets.  Head east on PA Route 5, pointing away from the rusted out city, and you'll find acre after acre of vineyards belonging to local wineries, where seemingly endless rows of native grapes grow atop cliffs overlooking the lake's blue waves. 

As a child, I had access to a grapevine.  Yup, a single grapevine.  A sore thumb in my working-class neighborhood of brick rowhouses, postage-stamp yards, and blue-collar folks more loyal to beer than Barolo, my neighbor's vine of Concord grapes grew along the wire fence separating her yard from ours.  Although the scent of the grapes was intoxicating in the fall, my mom's flower garden didn't appreciate the shadows cast by the grapevine's broad leaves.  My neighbor, who canned and preserved whatever she could get her hands on, often juiced the grapes.  I don't remember her doing this so much in later years, but man, oh man, did those grapes smell delicious. 

Reminiscing aside, I still had no idea what to do with my grapes after I purchased them.  I don't know how to make wine, and even if I did, Concords are a "foxy" grape ("foxy" refers to a musty characteristic in grapes), and as such, they aren't generally used in winemaking.  Concords are pretty tart to eat out-of-hand, and their large seeds offer a crunchy, bitter surprise to the unsuspecting eater.  I wasn't quite convinced that I wanted to use the grapes as anything more than a catalyst to ignite a stroll down memory lane, but in the end, I decided it was time to make new memories and a new recipe. 


Grilled Pork Tenderloin with Concord Grape and Wild Boar Bacon Reduction

1 pork tenderloin, about 1.5 pounds
1 c. Concord grapes, halved
2 large garlic cloves, minced
2 T. olive oil
2 T. balsamic vinegar
2-3 sage leaves, minced
1 T. coarsely ground black pepper
1 T. butter
2 ounces wild boar bacon, cut in 1/4" dice*
1 small shallot, finely minced
1/3 c. light-bodied white wine
1/3 c. chicken or ham broth
Concord grapes on the stem, to garnish

Combine the grapes, garlic, olive oil, balsamic vinegar, sage leaves, and pepper in a large glass or plastic container with a tight-fitting lid.  Using a potato masher or the back of a fork, mash all the ingredients together until a fragrant paste is formed.  Place the pork in the dish with the grape paste, rubbing the paste on the pork.  Marinate up to 24 hours, shaking the dish occasionally.  The longer you marinate the pork, the fuller the flavor will be. 

When you are ready to cook the pork, heat a grill or grill pan over high heat.  In the meantime, brush the grape marinade off the pork, reserving the marinade.  Grill the pork on each side until no pink shows.  Each side should take about 5 minutes; the pork is ready to turn when the pork easily releases from the grill/grill pan.  If you are using a grill pan, transfer the pork loin to a shallow ovenproof dish or a baking sheet lined with foil, and bake for 10-15 minutes.  This step is not necessary if using a charcoal grill. 

While grilling the meat, make the grape and boar bacon reduction.  Place the reserved marinade in a small saucepan with the wine and chicken broth.  Bring to a quick boil, then reduce heat to a low simmer.  Keep covered so liquid does not evaporate, and simmer for about 10 minutes. 

In a separate saucepan, melt the butter over medium-high heat.  Add the diced wild boar bacon and saute until the fat has melted and the boar bacon is crispy.  Add the minced shallot and saute for another 3-5 minutes, stirring frequently, until the shallot is soft and translucent.  Do not let the shallot burn. 

Now it is time to add the marinade liquid.  Place a very fine sieve (or a strainer lined with cheesecloth) over the saucepan containing the boar bacon and the shallot.  Pour the contents of the marinade pan through the sieve, pressing the remaining solids with the back of a spoon to release as much liquid as possible.  When all the liquid has been squeezed out, discard the solids and bring the grape liquid to a boil, and whisk the sauce until it begins to thicken.  If it does not thicken up, you can "cheat" by blending 1 T. cold water with 1/2 t. cornstarch, and then whisking this into the sauce. 

Once the meat is done, take it off the grill or out of the oven and let it rest for 10 minutes.  Slice into 1/2" thick rounds, and arrange the rounds over polenta squares.  Spoon the grape sauce over, and garnish with a small bunch of Concord grapes. 


* If you cannot find wild boar bacon, you can substitute regular bacon or pancetta.  Wild boar bacon is available by mail from Savenor's, one of my local butcher shops.

Sunday, August 28, 2011

Ingredient Spotlight - Ghost Peppers

"Would you like an atomic pepper, Mr. Mentolino?"


Remember that scene in "Dumb & Dumber?"  I'm pretty sure the atomic peppers consumed by the movie's two lovable losers were bhut jolokia, better known as 'ghost peppers.'  Native to India, these fiery fruits set a record in the Guinness Book of World Records in 2007 for being world's hottest pepper.  At 1,041,427 heat units, ghost peppers are approximately 400 times hotter than tabasco sauce on the Scoville scale, which measures a chili's heat based on how much sugar water is needed to neutralize its heat.  To put into perspective just how hot ghost peppers really are, consider that habaneros register 100,000 - 350,000 heat units, while law-enforcement grade pepper spray falls in the 500,000 - 5,000,000 heat unit range.  Rumor has it that biting into a ghost pepper can trigger a heart attack, but according to web sources, it isn't the heat of the pepper that could kill you, it's the potential that the concentration of capsaicin could cause anaphylaxis in some individuals and lead to suffocation. 

That was small comfort as I paid for a 50g carton of ghost peppers at Savenor's Market on Beacon Hill.  Operation "Woman vs. Food" had officially commenced. 

With a tall glass of sugared milk by my side, wearing my large-lensed sunglasses to protect my eyes in case any bits of chili went flying, my heart pounding with nervous anticipation, I pierced a ghost pepper's thick, slightly tough flesh with the blade of my paring knife, then held the cold metal blade against my tongue.  "That's not so bad," I thought.  The pepper tasted bright, almost citrusy, whereas I did not expect to be able to experience any discernible flavor through the fire.  That's when I learned why they're called ghost peppers - boy, do these babies sneak up on you!  The heat hit, but it didn't deliver a burn so much as a tingle.  The heat resonated throughout my mouth, spreading from the point of contact where I'd licked the blade of my knife, and a slight sting crept across my lips.  I sipped some sugared milk to snuff out the heat, then decided I should to try the ghost pepper again, only for real this time.  I sliced off a piece of pepper about the size of a grain of risotto rice, placed it on my tongue, bit into it, and sloshed it around in my mouth, letting the fire spread.

These peppers make "Dave's Insanity" look like "Dave's mild, completely manageable neuroses." 

The ghost pepper's effect was not nearly as devastating as I imagined - after all, I'd pictured myself screaming and scrambling for ketchup and mustard bottles, just like Harry and Lloyd in Dumb & Dumber - but keep in mind that I only consumed a minuscule amount.  If you can get your hands on ghost peppers, try them if you dare, even if only to satisfy your curiosity.

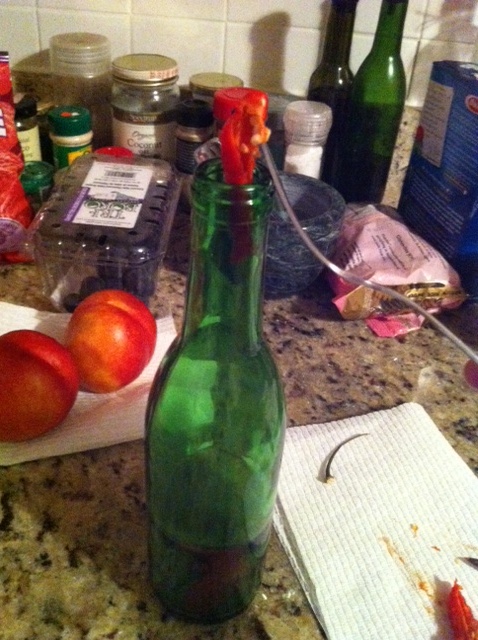
Not knowing if I could handle the heat if I chopped them and added them directly to a dish, I decided to use my ghost peppers to make a batch of hot pepper oil.  With the kind of heat ghost peppers pack, only a few drops will add a spicy kick to any food! 


Ghost Pepper Oil

2 ghost peppers, quartered*
2 cups olive oil

Add the peppers and the oil to a clean, resealable glass bottle.  Shake and allow to sit for 24 hours.  Use sparingly, adding drop-by-drop to any dish that could use some heat.  Great for bloody marys! 


* Be very careful when working with chiles.  If possible, wear gloves, and do not let the chiles, or anything the chiles have touched, come into contact with your eyes.