Tuesday, November 30, 2010

Thanksgiving 2010

Five days ago, I celebrated Thanksgiving with my mom by sitting down to a fabulous dinner, a fabulous dessert, and - obviously - fabulous leftovers!  I had plenty to be thankful for this year, including each one of my readers.  It really means the world to me that so many of you around the world have clicked on this site.  Whether you landed on this page because you’re my friend, because it popped up when you searched for a recipe or ingredient on Google, or because someone referred you to the site, you are the reason I continue to cook instead of ordering delivery, and you are the reason I try new recipes instead of reverting to my same-old-same-old tried-and-true entrees.  Molto grazie, amici! 

I did not do any cooking this weekend – when I’m at my mom’s, she’s the chef.  I stay out of the kitchen not only because space is limited and it can be cumbersome for two people to work at once, but also because she hides bacon and cheese from me and it's torturous to stand there without helping or snacking!  It’s usually a better idea for me to stay on the couch and chat from afar. 

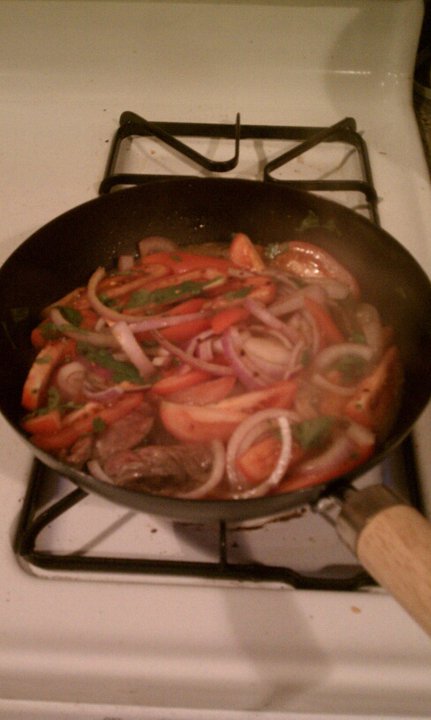
My mom kicked off the holiday weekend by making a hearty lentil and lima bean soup, along with a deliciously rich spinach, crab, and cashew quiche – she really had to twist my arm to get me to eat 2 slices in one sitting (ha, ha, ha)!  For Thanksgiving dinner, we had a salad featuring romaine lettuce with dried cranberries, pecans, and goat cheese; roasted Cornish hens, Thanksgiving “risotto” (brown rice cooked in broth with apples, sage, and sausage); roasted Brussels sprouts; roasted carrots; mashed potatoes with dill; and for dessert, pear-ginger crème brulee, which was absolutely fantastic - I will have to try to make that one myself!  I opened a bottle of Pinot Grigio with dinner, and to go with the crème brulee, we poured an Italian dessert wine whose name escapes me right now – I’ll have to write an update later, but I can tell you right now that it was deep red, tasted like ultra-concentrated spiced raspberries, and paired exceptionally well with brie.  On Black Friday we had Turkey Day Round II, and then on Saturday we dined on turkey burger patties with tarragon and green onion, served alongside rosemary roasted potatoes and buttered carrots. 

I didn’t hit the mall or the Kittery outlets on Black Friday – in fact, my mom and I made it a point to avoid major shopping centers.  Instead, we went to On The Vine marketplace in Stratham, NH – otherwise known as foodie heaven!  On The Vine boasts a delightful produce section, including fresh Brussels sprouts on the branch as well as loose sprouts.  My mom picked up our Thanksgiving sprouts here and was approached by another customer who asked, “Excuse me, are you taking all of the small ones?!?”  “Yup,” she replied, and continued carefully selecting and hoarding only the daintiest of the little green sprouts!  The market also sells fresh meat from The Meat House, fresh fish, local wines, craft beers, a wide selection of organic, vegan, and/or gluten-free grocery items, candies, teas, coffees, chocolates, and eco-friendly home and body care products.  On The Vine is a one-stop shop for anyone who dedicates his or her life to exceptional food.    

$50 later, I left On The Vine with a bottle of locally produced blueberry wine and a bottle of mead, which I like to call Irish Wine (mead is actually a fermented solution of honey and water that was historically consumed at Celtic pagan ceremonies held in the warmer months).  I also picked up a bar of Torrone, herbal tea, and a tub of Ciao Bella Chocolate Jalapeno gelato, which is probably now my 3rd favorite food discovery (after single-malt scotch and Ernesto’s pizza).  My only regret is not purchasing 4 more bars of Torrone – not that I can’t find it in Boston, but I was eating it for breakfast this weekend and it didn't last nearly as long as I would have liked.     

Incredibly, I left Portsmouth the same size as I’d arrived.  As much as I love cooking, I also love it when my mom takes the reins and cooks her absolutely amazing holiday dinners.  How many days until Christmas?!?!?    

Monday, November 22, 2010

Around the World in Eighty Bites - Thailand

The next leg of my “Around the World in Eighty Bites” journey stops in Thailand.  Thai food is known for being spicy, but many Westerners don’t seem to be as apprehensive about trying Thai food as they do about trying Indian or Japanese dishes.  Thai food is definitely exotic, but in an approachable manner. 

My first foray into international cooking was over 10 years ago when I experimented with a Thai squid salad recipe I found in Jeff Smith’s “The Frugal Gourmet on Our Immigrant Ancestors.”  Never before had I used unfamiliar ingredients such as Thai curry paste (an ingredient made from chiles, garlic, ginger, and spices), lemongrass, or fish sauce, but I fell in love with Thai flavors and wanted to try as many Thai recipes as I could get my hands on.  Once I headed off to Northeastern University and lived in my first off-campus apartment, my mom bought me a Thai cookbook.  I still use that cookbook today, despite the fact that entire sections are peeling away from the binding and some of the pages are glued together by splashes of coconut milk or soy sauce.  The book features write-ups about each ingredient common in Thai cooking, many of which are available in the States, either in cities with large Asian populations or via mail order.  My curiosity was aroused by some of these hard-to-find foreign ingredients.  Thankfully, I live in a city with a sizable Chinatown, and I’ve been able to locate imported items like tamarind, shrimp paste, and fresh lychees. 

My Thai cookbook also gives a detailed history of Thai cooking and culinary traditions.  I loved learning about the philosophy of the Five Flavors – hot, salty, sweet, sour, and bitter – and how these five flavors are incorporated into each dish.  I like that kind of playful balance that creates a party in one’s mouth!  It was also interesting to learn that traditionally, Thai women were sent to live in temples for years at a time.  In these temples, they learned the art of food preparation, including not only cooking, but garnishing.  The women learned to carve fruits and vegetables into elaborate edible figurines for presentation at formal meals.  These temples still exist in modern Thailand, but they are open to the public for tours, and cooking lessons are now available to men as well! 

Although I’ve tried many Thai recipes, I still have not made Pad Thai, Thailand’s most famous dish. I will someday.  My all-time favorite Thai recipe (so far) is a quick coconut-based curry with chopped pineapple.  Traditionally made with pork, this recipe can also be made using chicken or seafood, as I have done in the recipe below.  If you like it a little spicier, add some crushed red chile flakes or fresh minced chiles.  This recipe is light, yet rich, and like most Thai food, it pairs well with an ice-cold lager or ale. 


Seafood Curry with Pineapple

1 T. coconut or vegetable oil
1 shallot, minced
2 cups fresh pineapple, chopped into bite-sized pieces
1 can coconut milk
2 T. Thai green curry paste (Thai Kitchen is a good brand)
2 T. soy sauce
1 T. fish sauce
1 T. lime juice
1 T. grated fresh ginger
½ t. freshly ground black pepper
1 can sliced water chestnuts, drained
1 can baby corn, drained and sliced into bite-sized pieces
½ pound squid, sliced (see note)
½ pound firm whitefish, such as cod, sliced into bite-sized pieces
½ cup green onions, sliced into thin rings
½ cup shredded basil
½ cup chopped cilantro


Heat a large pot over medium-high heat, and add the coconut or vegetable oil.  When oil is heated, add the shallot and cook for 1-2 minutes, or until it has started to soften.  Do not let the shallot burn.  Next, add the pineapple to the pan and cook for 1-2 more minutes, stirring frequently. 

Add the coconut milk, green curry paste, soy sauce, fish sauce, lime juice, ginger, black pepper, water chestnuts, and baby corn to the pan.  Cook for 8-10 minutes, stirring frequently, until the curry paste is fully dissolved and the liquid has reached a low boil. 


Now, turn the heat up to high.  Once liquid is boiling, add the squid, fish, green onions, basil, and cilantro.  Cook for 1-3 minutes, or until the fish has firmed up and the squid begins to curl up.  Serve immediately over cooked jasmine rice. 


Note:  In traditional Thai cooking, squid is not cut into rings as is common in Mediterranean cooking.  Rather, it is cut into squares, and the inside of the squid’s tube is scored with a knife so that the pieces curl up into bite-sized cylinders when cooked.  To prepare squid in this fashion, cut each tube in half lengthwise, then cut each piece in half crosswise.  Using a sharp knife, make shallow slits in criss-cross pattern across the inside of the squid’s tube, being careful not to cut all the way through.  It is now ready to be cooked using a quick, high heat method, such as boiling or stir-frying. 


Friday, November 19, 2010

$80 wine + $8 pitchers = One Happy Blogger!

Last night was one of the most perfect Thursdays of my life.  Accompanied by a foodie friend, I attended a Barolo tasting, followed by dinner at small pizza joint in the neighborhood.  Not a glamorous evening, but neither of us could have been more pleased.  Great food and wine, topped off with a slight chill in the air and a clear sky offering great views of the city and all its lights, and I was in heaven! 

First, we attended The Wine Bottega’s Barolo Abbondanza, where we tasted 13 wines (only 4 of which I could afford to buy on a regular basis), and two liquers,  including Cardamaro, an Italian cordial distilled from cardoons and infused into wine.  Can’t even put my finger on the flavors, but it tastes like winter.  It also tastes like it should be splashed into a dirty gin martini.  My friend suggested pairing it with something containing rosemary or tarragon – tarragon seemed like a great choice, as it would complement the spiciness of the liqueur.  A splash of Cardamaro in a spicy ginger beer would also be a tasty treat. 

Onto the wine – I’ve never had the pleasure of tasting Barolo before, not for lack of interest, but lack of funds – it’s one of Italy's pricier varieties.  As explained at the tasting, the Nebbiolo grape is difficult to grow and it doesn’t adapt well to the winemaking process.  I’m certainly glad those Piemontese showed some persistence!  The wine is very rich, spicy, and fragrant – I jotted down some notes on the pamphlet the store distributes listing the featured wines, and at first, the most notable scents I picked up in were cinnamon and eucalyptus, until I noticed that one of the older bottles – 2003 Brovia Barolo “Villero” – gave off an aroma that I could not immediately identify, but I later figured out – brand-new ballet shoes.  Shoes?!?  Yes, shoes – ballet shoes, to be exact.  Ballet shoes are made from the softest of soft leather, and they hug your feet and accentuate your arches.  The leather clings so tightly to your toes that your instructor will take notice when you aren’t pointing your feet to their full capability.  Barolo has a hint of that kind of leather, not Payless leather.  Barolo and ballerinas actually do have a lot in common – after all, a good ballerina has to possess an unimaginable amount of strength and go through years of rigorous training in order to move so fluidly on two toes that each step looks effortless, almost as if she is floating.  Making such a smooth wine from a difficult grape doesn’t seem so different. 

We left the tasting happy, impressed, inspired, but empty-handed.  The shop was crowded and we were both very hungry, so we moved on to the next spot – a small pizza joint called “Ernesto’s” that received many favorable reviews on Yelp.  We cut across Prince Street and made our way over to Salem Street, glancing at each doorway trying to find 69 Salem.  I knew the general vicinity, but we still had to search.  I wondered if it had closed?  We walked a little further until finally, we saw a small sign over a narrow doorway – we found it! 

The entire restaurant (if you can really call it a restaurant, it’s more of a take-out joint with tables) isn’t much bigger than my computer screen, but that is fine by me.  We weren’t looking for a great scene; we came for pizza, beer, and each other’s company.  Don't go to Ernesto’s for ambiance.  Don't go if you’re looking for extensive beer and wine selections.  Don't go if you're looking for gourmet, wood-fired pizzas made from 100% organic semolina dough and topped with house-made mozzarella di bufala and special DOGC pepperoni imported from the northwest corner of Italy's Emilia-Romagna region made from beef and pork sourced from a producer who only feeds his animals champagne and sustainably-produced caviar. Go to Ernesto’s when you want bright lights, a perfectly greasy slice or two, and pitchers of cheap beer.  Ernesto's is my 2nd favorite discovery, second only to single-malt scotch.

Ernesto's meat lovers' pizza is phenomenal - loaded with pepperoni, sausage, ground beef, and plenty of cheese.  Add some hot pepper flakes, and you're good to go.  Only thing that could have made it better would be crumbled bacon, but it was still pretty mind-blowing, especially when washed down with Budweiser (what is it about pizza and cheap beer that is just so fantastic?!?).  Whatever my friend had was equally delicious – tomatoes, ranch, plenty of gooey cheese, and I don't remember what else.  I'm making it my mission in life to try each variety that they offer.  A slice is a quarter pie.  They have a few bottled beers, but keep it real and go with a pitcher of Budweiser, for which they'll give you plastic cups.  Not plastic pint glasses, disposable plastic cups.  Sheer perfection!  The photos and artwork on the walls sparked a great discussion regarding Godfather I vs. II, the merits of the book, and what a waste of film III turned out to be ("III?  I'd use it as a coaster!" he said).  I am head-over-heels in love with Ernesto's, and I may have to stop in again this weekend. 

So there you have it – my idea of an absolutely perfect weeknight, centered around great drink, great food, great friends, and a great city neighborhood.  Cheers! 

Tuesday, November 16, 2010

Around the World in Eighty Bites - India

Last night, I had a craving for Indian food, so I decided that my next stop on the “Around the World in Eighty Bites” train would be India. 

A lot of Americans are hesitant to try Indian food, which is a tragedy - Indian food is one of the healthiest and most diverse cuisines in the world.  Why it gets a bad rap, I do not know, but let me debunk a few stereotypes for these unadventurous folks:  1)  Not all Indian food is spicy.  Some is, but not all.  2)  Indian food doesn’t – how shall I put this politely? – cause intestinal discomfort.  3)  Indian food is not all vegetarian.  Again, some is, but not all. 

Trying to lump Indian cuisine into one category is difficult, because cooking styles vary by region.  Common to most Indian regions, however, is the use of rice, various types of lentils and other legumes, and spices.  “Curry powder” is a generic name given to Indian-style spice blends, and these blends vary widely.  Referring to all spice blends as simply "curry" would be like calling all Italian noodle-based dishes "pasta" without offering any sort of descriptors.  Some Indian spice blends contain more heat, achieved by using mustard seeds, chile pepper, garlic, ginger and black pepper, while some are sweeter and contain spices like cardamom, cinnamon, fenugreek, and clove.  Coriander, turmeric, and cumin are featured in many as well.  The blend you use will depend on the dish you are cooking and, of course, personal preference.  Experiment with several brands or create your own signature blend!

One of my favorite Indian dishes – and the one I cooked last night – is my version of Palak Paneer, a Northern Indian dish of cooked, mildly spiced spinach with cheese.  It is served over basmati rice, a slightly nutty flavored long-grain rice popular in Indian cuisine.  My recipe is different from the traditional version – I add tomatoes, I use brown basmati rice, and I add cooked peas to the rice.  I also like to serve it with a dollop of sour cream or plain yogurt to add a little extra richness.  Typically, the spinach is slow-cooked until it is broken down and soft, but I cooked mine for a shorter amount of time so that the leaves remained intact and some texture remained.  I could lie to you and claim that I did this to create a lighter version of the traditional dish, but it had nothing to do with culinary intentions and everything to do with the fact that not only was I hungry, but I was missing the Bruins game. 

If you cannot find Paneer cheese, Ricotta Salata is a decent substitute.  Some cooks claim that Feta is a good substitute, but I find it too salty for this dish and slightly overpowering.  I’ve also seen recipes claiming that Queso Fresco, or even mild Monterey Jack, makes a fairly decent substitute.

Another way that my recipe breaks from tradition is that I use a secret ingredient – Kala Jeera seeds.  Known as Black Cumin, these tiny seeds deliver a mild, flowery, and slightly musty taste.  I feel that just a small amount of Kala Jeera adds depth and mystery to the dish that can’t be achieved otherwise.  These seeds can be difficult to find, but Penzey’s carries them.  Please do try to find Kala Jeera – I don’t think this dish is as good without it!


Palak Paneer with Kala Jeera

2 T. butter or vegetable oil
1 onion, sliced
2 tomatoes, sliced
1 t. whole yellow mustard seeds
½ t. ground coriander
½ t. ground cumin
½ t. Kala Jeera seeds
¼ t. crushed red pepper flakes
¼ t. ground ginger
10 oz. fresh baby spinach, rinsed, with water clinging to the leaves
4 oz. paneer cheese, diced

Melt the butter over medium heat in a large pan with a lid.  Add the onion, tomatoes, and spices, cover, and cook until the onions have lost their crunch and the tomatoes have given off juices. 


Stir the onion and tomato mixture several times so that the spices are consistently blended.  Now, add the spinach.  Cover and let cook until the spinach leaves have softened, approx 10-15 minutes.  Stir occasionally.


Finally, add the paneer cheese and stir several times. The cheese may start to melt slightly; this is OK.  Serve immediately over basmati rice.    

Friday, November 12, 2010

Peruvian 101

Last night, I had the pleasure of dining on home-cooked Peruvian food.  I’ve neither cooked nor tasted Peruvian food before, and I didn’t cook it last night – I left the hard labor to the expert, my Peruvian friend who has been occupying a lot of my time lately.  Let me tell you something – having a man cook for me was delightful, and what made it more awesome is that the kid’s a great cook!

He lured me in with Lomo Saltado, a Peruvian dish consisting of sliced steak, tomatoes and onions marinated in vinegar and spices, then stir fried with a splash of soy sauce and topped with cilantro.  It is served over rice and fried potatoes, and he made a spicy Aji sauce to accompany the rice.  Holy Mary Mother of God!  This homemade hot sauce is quite possibly the best thing to ever happen to me, and I cannot wait to make my own.  I need to learn the proportions, but he told me that it’s easy to make and consists of habanero peppers, garlic, olive oil, salt and pepper.  

Letting someone else take control and do the work in the kitchen is one of the most difficult things I’ve ever done:

        “Can I help with anything?”  “No.” 
        “Can I at least do some dishes?” “No.” 
        “Really?” “Really.” 
        “Are you sure?” “Yes!” 

I literally had to go stand in the other room and watch from afar; standing in a kitchen and doing nothing felt far too odd and awkward.  I thought to myself, “This must be how goalies feel when the puck’s on the other side of the ice.”  I was fidgeting the entire time he cooked the stir fry.  I was relieved once the food was ready, because now I could do something with it, even if that something was simply shoveling it into my mouth. 

Along with our dinner, we shared a bottle of Rioja, which I tried for the first time last night.  I smelled and sipped the wine before I began eating so that the wine's flavor would be pure and would not have to compete with the flavors in the food.  My first thought?  The Rioja smelled exactly like Chianti.  I sipped; it tasted very similar to Chianti as well.  Definitely a variety I’d buy again.  Finally, it was time to taste the food. 

Each bite of Lomo Saltado was better than the last, and I wanted to savor each and every mouthful of the Aji-kissed rice.  I did – I painstakingly scooped up every last grain of rice with my fork until not one remained on my plate.  The meat was well-flavored and tender, the onions retained a slight crunch, and the tomatoes were bursting with flavor. He topped the dish with cilantro, which was the perfect foil for the spicy Aji sauce, and the Rioja was a great match for the dish as it was full-bodied enough to stand up to the bold flavors of Lomo Saltado.  When I commented that I thought the Aji sauce would be great on grilled tuna, he countered with, “It’s great on everything.”  I believe that.

This is definitely a recipe I’ll have to try on my own, but I’d be just as happy hopping in a cab and letting him wear the Chef hat!  I insist that you order this dish if you find it on a menu.  It’s a superstar!


Tuesday, November 9, 2010

Italian "Sushi"

About a week ago, I was giving serious consideration to turning life as I know it upside-down and heading to a cattle call for a chance to be included in the next crop of reality TV cooking show contestants.  After careful consideration (and careful reading of the fine print legalese on the application form),  I decided not to go after a spot on MasterChef, but I did gain something from the decisionmaking process – a new recipe. 

As part of the audition process for MasterChef, each contestant is required to bring a pre-prepared dish to the audition.  Contestants are not permitted to prep or cook any part of the dish at the audition; all work must be be done off site.  Although some leeway is allegedly given in the judging because of the fact that applicants have to wait for hours at a time, I’m sure the judges would wonder about a contestant’s judgment if he/she presented a dish that was only at its peak under specific temperature conditions.  The instructions suggested packing the prepared dish in temperature-controlled containers, such as coolers and ice packs for cold dishes and heat wraps for hot dishes, so I wanted to make something that would be OK in a cooler whose temperature regulation might crap out after six hours of waiting in queue. 

Although the show’s producers wanted contestants to present their signature dishes, my signature dish – linguine with radicchio and cream - would taste like raw sewage if not served piping hot (OK, not raw sewage – but the flavor and texture would be less than ideal).  I challenged myself to come up with something that would be OK served either slightly chilled or at room temperature.  I thought of making the Seared Sesame Tuna and Gingered Pumpkin that I cooked in “Around the World in Eighty Bites – Japan,” but my mom advised against it, her reasoning being that A) seared tuna has been done a thousand times,  and B) it is not the best example of my cooking style. 

Had I decided to audition for the show, I needed a dish that would make me stand out from the crowd and truly shine.  I was less concerned about perfect execution than I was about creativity – perfect execution can be achieved through practice, but creativity and the ability to be inspired are things that can’t be learned.  I also wanted to stay true to my culinary roots, so I was determined to cook something using Italian ingredients and/or techniques.  Something based on risotto, another one of my go-to dishes, seemed like a good starting point.  That’s when it hit me – Italian “sushi!”

My plan was to wrap cold risotto around a filling of sliced roma tomato, then roll each “log” through a layer of very finely chopped fresh basil.  Each roll would be sliced into small cylinders, much like maki rolls, and they would even look like maki sushi – green basil exterior, white risotto base, and the red tomato in the middle would resemble the filling in a tuna or salmon maki roll.  I’d make plain risotto with only a few teaspoons of grated parmesan – no other additions – so that the flavors from the risotto would not overwhelm the other ingredients.  I conducted my experiment last night, and it worked beautifully. 

I made the risotto using Japanese short-grain sushi rice, not because I thought it would work better, but because yours truly didn’t check her pantry before creating a shopping list.  I assumed I had risotto rice…you know what they say about assuming.  Risotto made using sushi rice tastes just like the real thing, but I’ll have to try this recipe again using real risotto rice to assess the texture and determine which rice is more suitable for this recipe.   Also, I made the first roll using only minced basil for the exterior, but I discovered that combining the basil with a few flakes of kosher salt helped the basil better adhere to the rice.  Be sure to use wax paper to make the rolls – the rice will stick to foil or plastic wrap. 

Try this recipe if you’re feeling creative – the result is a delicious cold dish perfect for an antipasto course! 

Italian "Sushi"

3 cups cold plain risotto
1 or 2 firm roma tomatoes, peeled and sliced lengthwise into thin strips
1 bunch fresh basil, very finely minced
Kosher salt flakes


Place about 1/3 cup of the risotto on a sheet of wax paper 4-5 inches wide.  Using the curved back of a large spoon, press the risotto into a rectangle approximately 2.5” X 6” and about 1/3” thick.


In the center of the risotto rectangle, place two of the tomato strips lengthwise. 


Bring the ends of the paper up and together so that the long edges of the risotto rectangle touch, then roll the remaining edges of the wax paper between your thumbs and index fingers so that the rice comes together around the tomato strips and a long cylinder is formed (as shown in photo, left). 


Spread the basil and a pinch of kosher salt in a thin, even layer on a cutting board.  Bring the risotto roll, still wrapped in wax paper, to the edge of the cutting board, then unroll it and guide the risotto roll onto the basil layer, rolling it through the basil so that the minced leaves cling to the rice. 

Once you have rolled the risotto through the basil, place the risotto roll on a clean surface and slice it crosswise into 1-inch cylinders.  Place them cut-side-down on a platter. 

Repeat these instructions until all of the risotto is used, then serve with Garlic and Caper Dipping Sauce, and eat using chopsticks. 

VARIATION:  To make an entire spread of Italian “Sushi” rolls, vary the fillings, the exterior herbs, and the dipping sauces.  For fillings, try strips of roasted red or yellow bell pepper, smoked mozzarella, thinly sliced prosciutto or mortadella, anchovies, preserved lemon peel, or marinated portabella mushrooms.  For the exterior herbs, try minced oregano, parsley, mint, arugula, or tender young chicory leaves.  For dipping sauces, try balsamic vinaigrette or bagna cauda, a hot dip based on butter, olive oil, and anchovy.


Garlic and Caper Dipping Sauce

¼ cup olive oil
2 T. dry white wine
1 T. grated pecorino romano
1 T. finely minced salt-packed capers (do not rinse salt)
1 garlic clove, finely minced

Combine all ingredients in a small bowl.  Whisk well with a fork or small whisk, let stand for at least 15 minutes, whisk again, and serve with Italian “Sushi.” 


Monday, November 8, 2010

Deviled Eggs – Far East Style

I wish I could remember what inspired to create this recipe, but I’m at a loss.  Sometimes ideas just pop into my head out of the blue, and if I think the idea will work, I load up my grocery cart, run with it, and hope for the best.  That’s what happened this weekend when I decided to create deviled eggs with an Asian twist. 

These beauties may look like regular old deviled eggs, but they pack a ton of flavor and a crunchy, tasty surprise!  Using Szechuan-style seasoning and Asian vegetables gives the filling an unmistakable Eastern flavor.  Play with the garnishes for added intrigue.  Your guests will love these gems! 


Deviled Eggs – Far East Style

6 hard-cooked eggs, chilled (see below)
2 T. finely chopped water chestnuts
1 green onion (green part only), halved lengthwise and thinly sliced
1 T. Szechuan seasoning (see below)
1 T. soy sauce
½ t. Thai green curry paste
1 T. sesame oil
1 T. minced cilantro

Shiitake mushrooms, sliced paper-thin, for garnish
Individual cilantro leaves, for garnish


Slice each egg in half lengthwise.  Carefully remove the yolks, without breaking the cooked egg whites.  Place the yolks in a mixing bowl with all remaining ingredients except for the garnishes.

Mix the egg yolk and seasonings until blended completely.  If the mixture seems too dry, add a little more soy sauce and sesame oil.  Spoon approximately 1 tablespoon of the mixture into each cooked egg white, creating a mound of seasoned yolk.  Divide evenly among the egg whites, using all the egg yolk mixture.

Top each egg yolk filling with a slice of shiitake mushroom and a cilantro leaf.  Serve chilled. 

VARIATION:  Replace the soy sauce with Thai fish sauce, and replace the shiitake mushroom garnish with several pearls of salmon roe. 


Hard-Cooked Eggs

6 eggs

Place the eggs in a deep saucepan with a lid.  Add cold water, covering the eggs completely.  If you touch one of the eggs at its widest part with your index finger, the water should come up to your 2nd knuckle.  Place on stove, uncovered, and heat until the water comes to a rolling boil. 

Once water is boiling, turn off the stove and place the lid on the pan.  Let sit completely still for 15 minutes, then drain the eggs and rinse several times with cold water until eggs are cool enough to touch.  Place them in the refrigerator and allow them to chill for a few hours, preferably overnight. 


Szechuan Seasoning

If you cannot find a Szechuan-style seasoning you like, you can make your own using a mortar & pestle or a spice grinder. 

2 T. toasted sesame seeds
1 T. yellow mustard seeds
1 T. coriander seeds
1 T. Szechuan peppercorns
1 T. ground ginger
½ t. white pepper
½ t. crushed red chile flakes

Grind all ingredients until a consistent powder is formed.  Store in a glass jar. 


Saturday, November 6, 2010

Around the World in Eighty Bites - Portugal

When I discovered that Bacon, Butter & Booze has readers in Portugal, I could not have been more thrilled - not only did one of my co-workers just turn me on to Portugal’s wondrous Vinho Verde, which Bon Appetit featured several months ago, but I also got the excuse I needed to try Cataplana, a Portuguese recipe I’ve always paused on while reading one of my favorite cookbooks, Jeff Smith‘s “The Frugal Gourmet on Our Immigrant Ancestors: Recipes You Should Have Gotten From Your Grandmother.”

I am not very familiar with Portuguese cuisine, which is surprising, considering that Coastal New England, especially Massachusetts’ South Shore, is home to a large concentration of Portuguese Americans. Here’s what I know about Portuguese food: Linguica sausage, seafood, and kale. Thanks to Wikipedia, I learned that salt cod (bacalhao), olive oil, garlic, and chiles are very popular. Portuguese cuisine is very similar to Italian cooking, especially southern Italian. Apparently, great minds really do think alike.

I’ll start with the wine, which I’m drinking while I write. The other day at work, one of my co-workers raved about Vinho Verde. Never having tried this variety before, she brought in a bottle for me, and did I ever enjoy it! My friends and I killed the bottle the other night, and I bought a new one of the same variety tonight. I’d try to give you some information about the winery, but their website is in Portuguese! The wine is very fresh, slightly effervescent, not very aromatic, acidic, and light (thank you, Wine 101!).

Onto the recipe - Cataplana is a dish of pork shoulder and clams cooked in a spicy wine broth. I picked up the pork from DiPaolo & Rossi and my clams from Mercato del Mare. Originally, I was going to buy cockles, but Liz and Keri, the shop’s owners, were familiar with my recipe and suggested that I use littlenecks. Their tip was right on the money - had I used cockles, the delicate clams would have gotten lost among the other flavors and textures, but littlenecks are larger, meatier and more substantial, so they worked wonderfully. And the pork - superb! It seems like it’s getting more and more difficult to find pork with a lot of flavor, but the meat they sold me actually tasted like pork! The recipe called for dry white wine, so I used Vinho Verde, and instead of the plain paprika called for in the recipe, I used smoked paprika from Penzey’s spices, a spice company that ships all over the country and sells some amazing spice blends. My final alteration was a sprinkling of crushed red pepper flakes.

While researching, I discovered that some versions of this recipe use several other ingredients, including tomatoes and red and green peppers. While I’d like to try those additions in the future, I’m glad I stuck with the basic version, because I got a great sense of the flavor of the sauce without it being overwhelmed by other flavors. I’d also like to make my own piri piri sauce, which I did not do for this recipe - instead, I used some red chile and garlic paste, thinned down with a bit of olive oil. I’ll reprint Jeff Smith’s recipe for Piri Piri, taken from the cookbook referenced above. I’d love to try this recipe with the real thing!!!


Cataplana (Portuguese Pork & Clams)

Based on Jeff Smith’s recipe in “The Frugal Gourmet on our Immigrant Ancestors”

1 lb. Boneless pork shoulder, cut into chunks
1 ¼ cup Vinho Verde
2 small cloves garlic, minced
2 t. Piri Piri (or another non-vinegar red chile sauce thinned with olive oil)
½ t. each salt and freshly ground black pepper
2 bay leaves
Olive oil
2 t. smoked paprika
1 onion, thinly sliced
1 lb. Littleneck clams, in their shells (scrubbed)

In a large bowl, combine the pork, Vinho Verde, garlic, Piri Piri, salt, pepper, and bay leaves. Marinate for two hours.
 
After the meat has marinated, remove the cubes and reserve the marinade. Heat a heavy-bottomed dutch oven or frying pan with high sides over high heat, add a generous splash of olive oil, and cook the pork until it begins to brown.


Once the pork has browned, reduce the heat to low. After about a minute, add the reserved marinade and the smoked paprika. Simmer the meat in the marinade, uncovered, until the liquid has almost evaporated (approx 45 minutes).


In the meantime, heat another heavy frying pan with a lid (preferably a transparent lid) over high heat, and add another generous splash of olive oil, and then add the onions. Cook the onions until they are soft but have not changed colors. Now, add the clams and cover with the lid. Cook for about 5 minutes, or until the clams have opened. You may want to shake the pan a few times during the cooking process, but do not remove the lid until the clams have opened.

Finally, once the clams are cooked, add the clams and the onions to the pork mixture, stirring well. Serve over cooked potato cubes or boiled rice.


Piri Piri

By Jeff Smith, “The Frugal Gourmet on our Immigrant Ancestors”

2/3 cup hot red peppers (tiny Thai peppers work well)
½ cup whiskey
1 cup olive oil

Combine in a jar and shake well. Cap the jar and let sit for a month before using, shaking frequently during the curing process.


Friday, November 5, 2010

Wine 101

Last night, I attended The Wine Bottega’s "Wine 101" lesson, which I mentioned in “Tales from the Tasting” (October 15).  I could not have been more pleased with this event, and I highly recommend it to anyone in the greater Boston area who wants to learn the basics of tasting and describing wine.  Held the first Thursday of every month, the two-hour lesson is only $10.  This is not a “sit down, look forward, be quiet, and raise your hand” kind of lesson; it is an informal discussion with lots of laughter.  LOTS of laughter!  

As a writer, the worst affliction possible is a loss of words.  That’s what happens to me when I sample a new wine – the only thing I can manage to articulate is whether or not I like it, along with one or two entry-level adjectives, such as “red” or “Italian” or “sparkling.”  Putting on the Captain Obvious hat is not exactly the best way to make my readers want to try what’s in my glass.   

The class began with a sampling of a few different liquids that exhibit the flavor profiles expressed in wines – acid, sugar, tannin, and alcohol.  Then, we learned several of the characteristics typically used to review and evaluate wine, such as color, viscosity, scents, and – duh – flavor.  We sampled three whites and three reds, and the wines we tasted were very diverse – from very sweet, very dry, very fresh and acidic, and very “oh my God I need to buy that!”  Kerri, the shop's owner, provided an assortment of breads, crackers, and cheeses, and encouraged us to sample while we sipped and get a feel for how certain foods bring out flavors in wine and vice versa.  Rather than telling us what we “should” smell or taste in each wine, we were encouraged to use our own senses and come up with our own terms to describe the scents and flavors we found in our glasses.  Some were typical, similar to the ones seen in wine magazines – peaches, cherries, berries – but some were quite interesting – pleasant descriptors, such as Christmas, rosemary, and leather, and some out-in-left-field ones such as mothballs, antique store, and – my favorite – “clean port-a-potty.”  The best part?  None of these answers are incorrect!  If beauty is in the eye of the beholder, wine is in the nose and tastebuds. 

As I predicted in “Tales from the Tasting,” the Italian reds are still my favorite – but now I know why!  I prefer medium- to full-bodied wines, I’m not a fan of sweet wines, and I adore tannic wines.  Turns out, tannins and fats are a perfect pairing.  No shock that I'd like something that pairs well with bacon and butter!  As for whites?  I like some of the acidic, crisp whites, but my white wine soul mates are “orange” wines, which are darker in color, more tannic, and have more body than many other whites as a result of the grape skins being left in the wine for a longer time.    

So there you have it – if I try a wine, I can now describe it, and you can decide for yourself if it’s something you’d like to pour.  I highly recommend Wine 101 (or, for those outside of Boston, something similar) for anyone who loves the vino but lacks the vocabulary to explain why they love it!   

Thursday, November 4, 2010

Around the World in Eighty Bites - Ireland

Playing off a popular stereotype about the Irish, a popular (and somewhat offensive) joke goes, “What do you call a six-pack and a boiled potato?  An Irish seven-course meal.”  Yeah, yeah, the Irish are known for their love for potatoes, but the sadly ironic fact is that potatoes became a staple in Irish cooking mainly because Catholics who were denied property rights needed to be able to feed their families cheaply and without grazing land for livestock.  Ladies and gentlemen, meet the nutritionally-dense potato, which was introduced to the Emerald Isle by traders and explorers and which originated in South America (specifically Peru, as my Peruvian friend informed me last night). 

Trust me, friends – there’s more to Irish cuisine than potatoes.  With its extensive seashore, fish and shellfish are very popular in Irish cooking, and a St. Patty’s Day feast would be incomplete without a loaf of crusty soda bread (with or without currants).  Kale and cabbage are turned into beautiful dishes, and the superb quality of Irish dairy and beef is appreciated worldwide.  Accents notwithstanding, my favorite thing to come out of Ireland is its delicious whiskey!

For my latest installment of “Around the World in Eighty Bites,” I decided to use traditional Irish ingredients – salmon, potatoes, and kale – cooked individually, but brought together with a delicious, decadently rich sauce based on Irish Whiskey and butter.  I picked up a pound of salmon and some oysters from Mercato del Mare last night, along with some curly kale at Alba’s Produce.  Sure, both of these spots are a little out of my way on a work night, but when you’re cooking with very few ingredients, each needs to stand out and not get lost on the plate.  This is especially true when you are entertaining – don’t subject your guests to garbage! 

To time this meal correctly, put the potatoes in the oven first, then put the salmon in the oven about 15 minutes later, and start the kale right after you close the oven door on the salmon.  Make the whiskey butter while the potatoes are broiling.  And - last but not least - go ahead and sip a little whiskey while you're cooking.  It builds character. 


Baked Salmon with Whiskey and Thyme

6 sprigs fresh thyme
1 pound salmon fillet, cut into 4 oz. strips
About ¼ cup Irish whiskey, such as Jameson
5 pats butter

Preheat the oven to 375.  Place the thyme sprigs crosswise in a rectangular baking dish, spaced about an inch apart.  Then, place the salmon strips, skin side up, across the thyme lengthwise, so the salmon and thyme are criss-crossed.  Splash the whiskey in the baking dish so that it evenly coats the bottom of the dish, and then place a pat of butter between each salmon strip (including between the end pieces and the walls of the dish). 

Place in the oven and bake for approximately 13-15 minutes, or until the salmon is cooked through.  Serve with Whiskey Butter Sauce.

Whiskey-Braised Kale

1 pound kale, ribs removed
Splash Irish whiskey
¼ c. chicken broth
Salt and pepper to taste
4 sprigs fresh thyme
4 pats butter

Combine all ingredients in a heavy bottomed saucepan with a lid.  Cook over low heat until the kale is wilted.


Whiskey Butter Sauce

½ stick butter
Leaves from 2 sprigs fresh thyme
¼ cup Irish Whiskey
Pinch finely ground black pepper

Melt the butter and let it begin to brown slightly.  Now, add the thyme, whiskey, and pepper.  The butter will froth when the whiskey is added.  Cook over high heat until you can no longer detect a strong alcohol scent and the sauce has reduced slightly.  Whisk a few times with a fork or small whisk, and spoon over your salmon, potatoes, and kale. 


Red Potatoes with Whiskey and Thyme

1 pound red potatoes, halved lengthwise and cut into 1/3” slices
Splash whiskey
Leaves from 4 sprigs fresh thyme
Salt & pepper to taste
4 pats butter

Preheat the oven to 375.  Combine all ingredients except the butter in a baking dish, toss to coat the potatoes with the whiskey and spice mixture, then add the butter. 

Place in the oven and bake for approximately 30 minutes, stirring once or twice. 

Now, once the potatoes have cooked and the salmon is done, place the dish under the broiler and broil for about 5 minutes, or until the edges of the potatoes begin to turn golden.  Remove from the oven and serve with Whiskey Butter Sauce.