Showing posts with label snacks. Show all posts

Monday, January 9, 2012

Dried Mushroom Crisps

When I was 11, I didn't want clothes or Barbies or video games for Christmas; I wanted a food dehydrator. Weird, right? I blame it on the fact that A) I played waayyy too much "Oregon Trail" at school, B) Kirsten, the Swedish pioneer girl, was my favorite American Girls character (now discontinued...*crying*), and C) I was home sick a lot that year and developed quite an obsession for "Little House on the Prairie" reruns. I believe that those three things led me to my fascination with the American Frontier period. This meant that A) I would never be popular crowd material, and B) although I enjoyed reading fictional and nonfictional accounts of that time period, I wanted to understand the experience. I wanted to eat what they ate; hence the food dehydrator.

Humans have used drying as a food preservation method since the dawn of time, but drying was especially important to the Pioneers who set out across the country on wagon trains. Dried food was lightweight and compact, leaving more room in their wagons for other necessary supplies, like guns and whiskey. 

mushrooms on drying rack
Back to the early 90's. Along with my food dehydrator, my mom bought me a book called "How to Dry Foods" by Deanna DeLong, which I have since learned is practically the Bible of food drying manuals. Ms. DeLong offers a comprehensive guide on prep procedures and drying times for dozens of fruits and vegetables, as well as guides for making meat and fish jerky, fruit leathers, and many other helpful recipes, tips, and ideas. I tried many of them, and even at age 11, I wanted to try to do things my way (hint - orange segments do not dehydrate well).

Of all the foods I dried, sliced mushrooms produced my favorite result by far. Crisp and earthy, these babies always satisfied my crunch cravings. Because I dry my mushrooms in order to use them as snacks, my process is a bit different than that of the Italians and Chinese, who dry mushrooms simply so that they are available for use in recipes when fresh mushrooms are not in season. Imagine that - what my ancestors did out of necessity, I now do simply because I want a tasty snack! You don't even need a food dehydrator; you can do this in your oven as well. Not only is this snack delicious, it's great for all you New Year's Resolution dieters who are looking to replace your artificially flavored, partially hydrogenated, genetically engineered, deep-fried corn and potato crisps. Give this snack a shot! 

* Food dehydrators are available for purchase at many major department stores and housewares stores; they can also be purchased online.

Dried Mushroom Crisps

2 c. boiling water
1 T. mild vinegar
2 t. salt
2 t. seasoning blend of your choice
1 pound button mushrooms, sliced 1/4" thick

Combine everything but the mushrooms in a mixing bowl, and blend until the salt has dissolved. Add the mushrooms. Give them a few stirs so that each of the slices are submerged momentarily. The mushrooms will float, so give them a few stirs every 10 minutes or so, and let marinate for one hour. 

Once the mushrooms have marinated, drain them from the brine and follow the drying method of your choice.

Food Dehydrator Method:
Place the mushrooms on the racks of a food dehydrator with all air vents fully open. Dry for 36-48 hours, or until they are crisp and no moisture remains. 

Oven Method:
Preheat the oven to 190. In the meantime, prepare the mushrooms. The mushrooms will fall through a standard oven rack, so pierce a sheet of foil every half-inch or so and place the tinfoil on a rack. Arrange the mushrooms on the tinfoiled rack and place in the oven. Leave the oven door ajar (you can keep it lodged open with a wooden spoon) and bake for 6-8 hours, or until the mushrooms have dried. 

These are delicious alone, but you can also dip them in traditional chip and veggie dips!

Monday, December 13, 2010

Sunday Funday!

After spending the last several Sundays being too lazy to do much of anything, I finally had some motivation this week to whip together some great food and drinks!  Yesterday was the perfect Sunday Funday – it was raining cats and dogs, so I did not feel bad about sitting on my duff in my pajamas, eating, day drinking, and watching football and hockey all day.

Before I get to the recipes, I have to share my belief as to what constitutes a great Sunday Funday.  The presence of good friends (or at least cool roommates) is key, and you must be wearing cozy, comfy clothing.  If you’ve gone out the night before and you’re not feeling so chipper in the morning hours, that’s OK; Sunday Funday is all about starting off with a little “hair of the dog” and continuing from there.  Good breakfast food and drinks, some munchies, some substantial food, good company, and a few good games are just what the doctor ordered! 

I kicked off my Sunday Funday with the perfect brunch cocktail – the “Bourbellini.”  I am not much of a bourbon drinker, I’m a scotch girl.  However, I’m a firm believer that scotch should not be poured before noon.  Enter Bourbon.  Bourbon is sweeter; it is not smoky like scotch, and therefore, it is perfect for my two brunch recipes, The Bourbellini, and Bacon & Bourbon French Toast.  

I created Bacon & Bourbon French Toast because I love the taste of bacon combined with maple syrup, and I wanted to showcase that flavor combination in a recipe.  I also love French Toast, so I decided to stay true to my title and make French Toast containing bacon, butter, and booze.  Rich, satisfying, and unique, this may have to be my go-to weekend breakfast from now on. 

For my snack dish, I managed to replicate Estragon’s Garbanzos Fritos, or fried chickpeas.  Crunchy and flavorful, serve them in a bowl and eat them like popcorn.  They’re a lot more satisfying!  And for the main dish, I cooked up my Halftime Steak, named as such because it takes no longer than an average halftime break to prepare and cook. 

There are only a few weeks of football left, so I suggest you shop for these ingredients on Saturday, gather the troops, and treat yourselves to these recipes on your next Sunday Funday! 


Bourbellini

1 oz. bourbon
1-2 oz. peach nectar
champagne or sparkling wine

Pour the bourbon and peach nectar into a champagne flute or wine glass (or a pint glass, depending on your style).  Fill the rest of the glass with champagne/sparkling wine, stir gently.  (makes 1)

WARNING:  This is a prime example of a danger drink, so do me a favor and don’t drive if you’re drinking these babies...


Bacon & Bourbon French Toast

4 slices center-cut bacon
4 large eggs
2 oz. bourbon
8 slices spongy bread (plain white is fine, as long as it’s fresh)
butter
Powdered sugar
Maple syrup


In a frying pan with a large cooking surface (big enough to hold at least 2 slices of bread), cook the bacon over medium-high heat until crisp.  Turn off heat, remove the bacon from pan and set aside on paper towels; do not drain the bacon fat from the pan, but remove any charred bits.

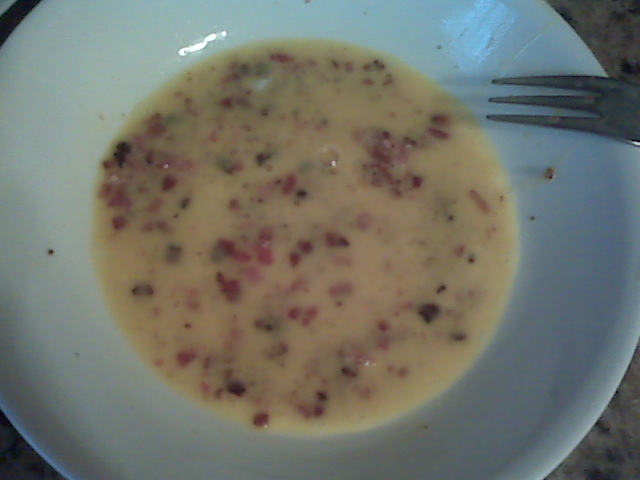
Once the bacon has cooled enough to touch, crumble it into very small pieces (you may have to use a knife and chop it a little if it’s not crispy enough to crumble using your hands).   Place the crumbled bacon in a shallow dish large enough to lay one slice of the bread completely flat.  Add the eggs and the bourbon to this dish, and beat the egg, bacon and bourbon mixture with a fork or whisk until the eggs’ yolk and white are completely blended. 

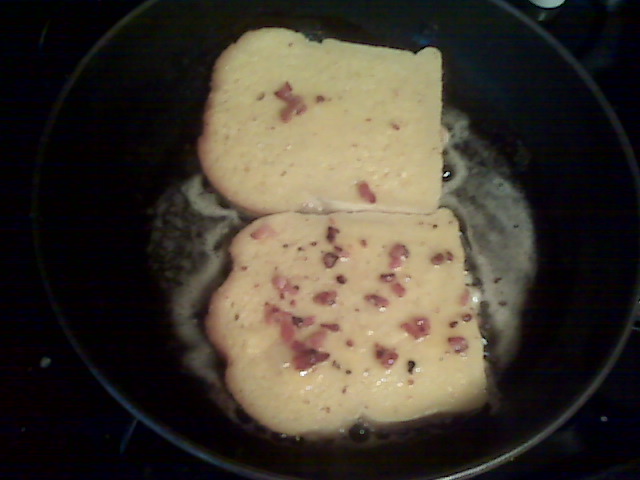
Place the pan containing the bacon drippings over medium heat, and add a pat of butter.  In the meantime, lay one of the slices of bread in the egg mixture until it is completely coated on one side; flip it over and repeat so that both sides of the bread are completely covered with the egg mixture.  Now, add the coated bread to the pan with the bacon drippings, and fry for a minute or two on each side, or until the bread begins to turn golden brown.  Repeat with the remaining slices (you’ll probably have to work in batches), removing with a spatula and adding a little extra butter to the pan between batches (if necessary). 

Serve in stacks of 2-4 slices, dusted with a bit of powdered sugar.  Offer maple syrup, extra butter, and Bourbellinis! 


Garbanzos Fritos

1 can chickpeas, drained
splash olive oil
1/2 t. ground cumin
1/4 t. garlic powder
1 t. smoked paprika
1/2 t. fine sea salt
1 T. chopped fresh parsley

Dry the chickpeas completely, using paper towels.  This is a very important step; if they are not completely dry, they will not fry correctly. 

Heat a frying pan with deep sides over high heat, and add a generous splash of olive oil to completely coat the bottom of the pan.    Add the chickpeas to the pan and cook, shaking occasionally, until you can hear the chickpeas "pop."  If you have a splatter guard, you may want to use it.  This should take about 8 minutes.  You may have to work in batches, depending on the size of your pan. 

Drain the fried chickpeas on a paper towel, then add to a bowl and toss with all remaining ingredients until chickpeas are completely coated.  Serve warm.


Halftime Steak

2 steaks, about 1 inch thick (I use sirloin or filet mignon)
1 clove garlic, halved
kosher salt
coarsely ground black pepper
butter, softened
several paper-thin slices of garlic (think Goodfellas!)

Before kickoff, place your steaks out so that they've reached room temperature by halftime.

As soon as the 2nd quarter ends, heat a heavy-bottomed frying pan, preferably cast-iron, over high heat.  In the meantime, rub the steaks with the garlic clove halves, and then season each side of the steaks with a pinch of kosher salt and a generous coating of black pepper.

Once the steaks are seasoned, check to see if your pan is ready.  If you fling a few drops of water on the surface, they should bead up and dance across the pan rather than staying put and sizzling. 

Once the pan is ready, throw a few pinches of kosher salt into the pan, then add the steaks.  Sear for 1-3 minutes per side, using tongs to turn them over.  (Note:  This timing will result in a rare steak.  If you want yours medium or well, it takes longer.  Not sure how much longer; I eat my steak rare!)

Remove the steaks from the pan and set aside to rest for approx. 5 minutes.  This is very important that you do not touch the steaks while they rest; this step distributes the juices. 

When the steaks are ready to serve, sprinkle a few paper-thin slices of garlic on each one, and top with a pad of butter.  Once the butter has melted, they're ready to eat!  Good accompaniments are baked potatoes or seasoned boiled rice (I prefer rice with a dab of Aji Sauce, a recipe I am still trying to perfect and will post once I'm satisfied).

Monday, November 8, 2010

Deviled Eggs – Far East Style

I wish I could remember what inspired to create this recipe, but I’m at a loss.  Sometimes ideas just pop into my head out of the blue, and if I think the idea will work, I load up my grocery cart, run with it, and hope for the best.  That’s what happened this weekend when I decided to create deviled eggs with an Asian twist. 

These beauties may look like regular old deviled eggs, but they pack a ton of flavor and a crunchy, tasty surprise!  Using Szechuan-style seasoning and Asian vegetables gives the filling an unmistakable Eastern flavor.  Play with the garnishes for added intrigue.  Your guests will love these gems! 


Deviled Eggs – Far East Style

6 hard-cooked eggs, chilled (see below)
2 T. finely chopped water chestnuts
1 green onion (green part only), halved lengthwise and thinly sliced
1 T. Szechuan seasoning (see below)
1 T. soy sauce
½ t. Thai green curry paste
1 T. sesame oil
1 T. minced cilantro

Shiitake mushrooms, sliced paper-thin, for garnish
Individual cilantro leaves, for garnish


Slice each egg in half lengthwise.  Carefully remove the yolks, without breaking the cooked egg whites.  Place the yolks in a mixing bowl with all remaining ingredients except for the garnishes.

Mix the egg yolk and seasonings until blended completely.  If the mixture seems too dry, add a little more soy sauce and sesame oil.  Spoon approximately 1 tablespoon of the mixture into each cooked egg white, creating a mound of seasoned yolk.  Divide evenly among the egg whites, using all the egg yolk mixture.

Top each egg yolk filling with a slice of shiitake mushroom and a cilantro leaf.  Serve chilled. 

VARIATION:  Replace the soy sauce with Thai fish sauce, and replace the shiitake mushroom garnish with several pearls of salmon roe. 


Hard-Cooked Eggs

6 eggs

Place the eggs in a deep saucepan with a lid.  Add cold water, covering the eggs completely.  If you touch one of the eggs at its widest part with your index finger, the water should come up to your 2nd knuckle.  Place on stove, uncovered, and heat until the water comes to a rolling boil. 

Once water is boiling, turn off the stove and place the lid on the pan.  Let sit completely still for 15 minutes, then drain the eggs and rinse several times with cold water until eggs are cool enough to touch.  Place them in the refrigerator and allow them to chill for a few hours, preferably overnight. 


Szechuan Seasoning

If you cannot find a Szechuan-style seasoning you like, you can make your own using a mortar & pestle or a spice grinder. 

2 T. toasted sesame seeds
1 T. yellow mustard seeds
1 T. coriander seeds
1 T. Szechuan peppercorns
1 T. ground ginger
½ t. white pepper
½ t. crushed red chile flakes

Grind all ingredients until a consistent powder is formed.  Store in a glass jar.