Showing posts with label baking. Show all posts

Saturday, December 15, 2012

Italian Christmas Cake (Panforte di Siena)

For several years now, I’ve made a traditional Italian Christmas cake called “panforte di Siena” for Christmas. It is an extremely rich, chewy cake loaded with dried fruits, toasted nuts, chocolate, and honey. I’ve experimented with a few variations—some have worked, some have not, but either way, baking this cake has been on my December “to do” list ever since 2007 when I discovered the recipe in “World Food: Italy” by Linda Doeser.

This year, I enhanced it with kahlua, chipotle pepper, and chia seeds, a “superfood” packed with fiber, protein, and omega-3 fatty acids. This cake is extremely rich, so one cake will easily serve 16 people, as portions are best kept small.

Slices of this are lovely when served with a light, tannic red wine!


Italian Christmas Cake (Panforte di Siena)


Cake "batter"
Dry ingredients:
2/3 c. toasted hazelnuts, chopped
2/3 c. toasted almonds, chopped
2 T. toasted pine nuts, chopped
2 T. chia seeds
2/3 c. candied citrus peel, minced
1/3 c. dried cranberries
1/3 c. dried pineapple rings, minced
Grated rind of 1 orange
2 T. unsweetened cocoa powder
1 t. ground cinnamon
½ t. ground chipotle pepper
¼ t. ground coriander
¼ t. ground cloves
¼ t. freshly grated nutmeg
1/3 c. almond flour
¼ c. all-purpose flour

Wet ingredients:
½ c. sugar
½ c. chestnut honey
1 T. butter
1 T. Kahlua
1 t. rose water (optional)

To prepare, line an 8-inch cake pan with removable sides with parchment paper, and preheat the oven to 300. In the meantime, combine the dry ingredients in a large bowl and mix well.

Combine the sugar, chestnut honey, butter, Kahlua, and rose water (if using) in a large, heavy-bottomed pot over low heat. Stir until the sugar is dissolved, then bring to a boil, cooking for about 5 minutes (the mixture should foam a bit). Stir in the dry ingredients and remove from heat.

Using a wooden spoon, continue to stir the mixture off of the heat source, then spoon the mixture into the parchment-lined cake pan. The mixture will be thick and sticky, so flatten it out with the back of the wooden spoon (dampen the spoon with warm water if the mixture sticks too much). Place in the oven and bake for one hour. When baking is complete, remove the pan from the oven, place the pan on a heatproof surface, and allow to cool for at least 30 minutes.

Once the cake has cooled, invert the cake on a serving platter or plate, remove the parchment paper, and slice into thin wedges to serve.

* Nutritional info: you don’t want to know…


Removing parchment paper


Italian Christmas Cake with a slice removed

Slice of Italian Christmas Cake


Friday, May 13, 2011

OMG!!! I Baked a Cake!!!

Holy $#!t.  Last night, before having my heart broken by the Detroit Red Wings, I baked a cake.  Not only did I bake a cake, I baked a cake without a recipe and without firemen showing up.  Strange things are afoot at the Circle K.  Do you see that weather report?!?!? 

The first time I baked a cake, I was 19 years old and a freshman in college.  Broke as a joke, I couldn't afford to buy my mom anything nice for her birthday, so I decided that a homemade treat would be the best way to show her how much I care.  I whipped out her copy of "The Joy of Cooking," sifted through the recipes, and found one for which I had all the ingredients. 


I stirred, mixed, preheated, and did everything I was supposed to do.  I was going to make the best damn cake my mom ever tasted!  ...or so I thought.  The two layers didn't pop out of the pans like they were supposed to; half the cake stuck to the pan, leaving me with two concave half-cakes and a handful of crumbs.  Not to worry - frosting hides all sins.  Using crumbs like mosaic tiles and my homemade frosting as my grout, and I spackled and painted until the cake looked like it belonged on the cover of Martha Stewart magazine.  Then, using tubes of colored icing, I wrote the words "Happy Birthday, Mom!" in gorgeous edible calligraphy.  "I ROCK!" I thought to myself while I waited for her to get home from work. 

When my mom came home, she was certainly surprised - after all, at that point in life I had never used an oven unsupervised.  But the real surprise came when she took her first bite.  Anxious with enthusiastic anticipation, I watched her put the first forkful into her mouth.  Did she like it?

"Well honey, it's the thought that counts!"

What?!?  I didn't know whether to scream, laugh, or cry!  I tasted the cake to see how my beautiful creation could have been anything less than breathtaking.

UGH!  THE FROSTING TASTED LIKE SUGARY OCEAN WATER!  Yup, I must have somehow misread the recipe, because it tasted like I'd added about 1/4 cup of salt.  Calling it heinous would have been the understatement of the century, but my mom was right - it was the thought that counted, and to this day, we still laugh about my hilarious foray into the world of baking, and the gift of laughter was better than anything I could have purchased.      


Funny as the salt cake incident may be, I haven't exactly had much confidence in my baking abilities since.  I can do focaccia, and I've baked a few batches of cookies and dog biscuits, but cake?  Nah.  Besides, I'm not really a dessert person.  So what inspired me to bake a cake last night?

I have no idea.  Just a craving, I guess.  I wanted a light cheesecake that I could top with cooked, buttered apples. 

The Italians are pros at baking light, fluffy cheesecake-like dessert using ricotta instead of cream cheese.  In fact, I made one of these before.  It was supposed to have an almond crust, but since my crust stuck to my counter and the empty wine bottle I was using as a rolling pin, it ended up being more pudding than pie.  The filling turned out fine and tasted delicious, but crust?  Never again.  I avoid recipes that require me to bake a crust.  However, I hypothesized that I could cheat my way through crust by lining the bottom of a pie pan with crumbled cookies, pouring in the filling, and then topping it with more crumbled cookie crumbs. 

Grating nutmeg.
Turns out I was right!  I tested my hypothesis and ended up with a splendid cake, which I then topped with apples that I'd cooked briefly in nutmeg brown butter laced with a bit of sherry.  I've gotta bake this one for my mom - sure, it's the thought that counts, but it's the flavor that makes you want to go back for seconds!

Please note that there is no sugar in this recipe.  Feel free to add 1/4 c. sugar to the filling if you prefer a sweet cake.  Also, you can use ground nutmeg if you don't want to grate your own, but ground nutmeg is the culinary equivalent of Van Halen with Sammy Hagar instead of David Lee Roth - it just doesn't compare! 

Ricotta Cheesecake

12 Stella D'oro Margherites (or similar cookie)
15 oz. ricotta, liquid drained off
2 eggs
1/4 c. whipping cream
1 t. freshly grated nutmeg

Preheat the oven to 375.  In the meantime, use your hands to crumble 6 of the Stella D'oros, and use the crumbs to line a 9-inch cake pan with removable sides. 

Next, combine the ricotta, eggs, whipping cream, and nutmeg in a large mixing bowl.  Again, use your hands and crumble two of the Stella D'oros into the bowl.  Using an electric beater, beat the ingredients for about 2-3 minutes, or until the mixture is light and fluffy. 

Pour the ricotta mix into the cake pan.  Using a spatula, smooth the filling on top.  Now, crumble the remaining cookies and spread the crumbs evenly over the filling.  Place in the middle rack of your oven and bake for 30-35 minutes, or until the filling is set.  Let cool for at least 30 minutes, then serve with Apples in Nutmeg Brown Butter.


Apples in Nutmeg Brown Butter

2 Golden Delicious apples, finely diced
1/2 stick butter
1 t. freshly grated nutmeg
2 T. sherry

Melt the butter in a large, heavy-bottomed frying pan over medium-low heat.  Cook until the butter begins to froth and give off a rich fragrance.  Now, add the nutmeg and stir to incorporate. 

Add the apples to the pan, increase the heat to medium, and stir for about 2-3 minutes until all the apples are coated with the nutmeg butter.  Add the sherry.  Continue to cook, stirring frequently, for about 5 more minutes, or until the apples have softened a bit. 

Use as a topping for ricotta cheesecake.  This would also make a good condiment to serve alongside slices of roasted pork tenderloin. 

Wednesday, December 8, 2010

Homeless for the Holidays Bake Sale, Lemon Ricotta Cookies

Beginning tomorrow, the MSPCA Animal Care and Adoption Center is holding its “Homeless for the Holidays” bake sale to raise money for the shelter animals.  Thursday 12/9 – Sunday 12/12, from 9-5, delicious baked goods will be available to the public, including some bearing the Bacon, Butter & Booze logo!

After exhausting myself baking gazillions of treats for the shelter’s Howl-O-Ween bake sale, I swore I wouldn’t do this again unless I had help, but alas, I got down to business and baked my little heart out.  After all, it’s for the animals, and they don’t understand the concepts of being too busy or too tired.  So, I dropped the gloves (OK, oven mitts) and squared off to fight my fatigue in order to bake Roasted Garlic Focaccia Bread (click here for recipe), Canine Crumpets (click here for recipe), and several batches of delicious, moist, almost cake-like Lemon Ricotta Cookies (recipe below). 

If you are in the Boston area and able to swing by South Huntington Ave., you can sample some of these fabulous treats along with other homemade goodies and donations from some of Boston’s best bakeries.  If you cannot stop in, do try this yummy cookie recipe at home! 

Lemon Ricotta Cookies

2 1/2 cups all-purpose flour
1 1/2 teaspoons baking powder
1 teaspoon salt
1 stick unsalted butter, softened
1 1/2 cups sugar
2 eggs
1 2/3 cups whole milk ricotta cheese, drained if necessary*
Zest from 2 large lemons
Juice from 2 large lemons, separated
1 cup powdered sugar
Preheat the oven to 375.  In a large mixing bowl, combine the softened butter and the sugar.  Use an electric mixer, mix for approx 3-5 minutes, or until the sugar and butter are consistently combined.  Add the eggs, one at a time, beating well. 

Next, add the ricotta, lemon zest, and juice from one of the lemons.  Beat this again until well-mixed, then add the flour, baking powder, and salt.  Mix until wet and dry ingredients are fully incorporated and a sticky dough is formed. 

Using a spoon, portion approximately 2 tablespoons of the dough (roughly golf ball size) per cookie onto a baking sheet, leaving enough room between cookies for them to expand (they will end up about 3 inches in diameter).  It is best to prepare each baking sheet just before it is to go in the oven; if you prepare the sheets ahead of time, the dough will ‘melt’ and your cookies will turn out flatter, less fluffy, and may collide with each other on the sheet.   Bake for 15 minutes, or until the edges begin to brown slightly. 

While the cookies are baking, prepare the glaze.  In a small bowl, combine the juice of the 2nd lemon and the powdered sugar.  Stir until a smooth glaze forms.  Set aside.

Once you remove each round of cookies from the oven, give them about 20 minutes to cool a bit.  Using a small brush (silicone ones are best, as you don’t have to worry about bristles falling out), brush each cookie with the glaze and set aside to allow the glaze to harden for at least 2 hours. 

OPTIONAL:  Channel your inner artist - sprinkle the glaze with colored sugar while the glaze is still wet, or, once the glaze has hardened, use colored icing or glaze in a small-tipped tube to draw fun shapes or designs.

*  Use a high-quality ricotta (I prefere Dragone brand) – some brands tend to be watery, which will affect the texture of the cookies. 

Friday, October 29, 2010

MSPCA Bake Sale, Canine Crumpets


This is what 500 Canine Crumpets looks like!

Whew! 14 hours, 500 canine crumpets, 60 biscotti, and 40 slices of roasted garlic foccacia later, and I am finally done preparing for the MSPCA’s Halloween Bake Sale! This was a lot more time-consuming than I thought it would be, so if I decide to do this again I‘ll definitely try to bribe a few friends to help out. After an entire day of baking, I’m fried!

Two of the recipes I made have been featured in previous posts, but I will repost them, along with a new recipe, Canine Crumpets. This is not an original recipe (I found it online here), but I did tweak it a little, adding more parsley after a suggestion in Natural Dog Magazine. These doggie biscuits are very easy to make, although you might have to hunt for some of the ingredients, suc
h as soy flour. Dogs love them - Tessie, my roommate’s dog, will jump almost four feet in the air for one of these things, and when I take them to the shelter for the dogs on the adoption floor, even the pickiest dogs perk right up for one of these!

Dogs are man’s best friend; bake a batch of these and you’ll be their best friend!


Canine Crumpets

½ pound chicken livers
1 cup chicken stock
½ cup corn oil
¼ c. chopped parsley
1 cup powdered milk
1 cup rolled oats
½ cup brewer’s yeast
1 cup soy flour
1 cup cornmeal
3 cups whole wheat flour
Preheat the oven to 350. Slice the chicken livers into smaller pieces and cook them over high heat in a frying pan. When they are fully cooked through, place them in a blender with the chicken stock, corn oil, and parsley. Blend until liquefied.

In a large mixing bowl, combine all remaining ingredients and mix well. Add the chicken liver puree and mix again, using your hands - the dough will be very stiff.

When dough is completely mixed, break off a tennis-ball section, wrapping the rest in plastic. Take the dough ball and roll it into a quarter-inch thick sheet. Using a small cookie cutter, cut into shapes and place on a baking sheet lined with foil. Bake them 16-20 minutes or until golden brown. Allow to cool completely, then transfer to a plastic container. They will keep longer if stored in the refrigerator.

Pumpkin Pecan Biscotti

3 ½ c. unbleached all-purpose flour
2 ½ t. baking powder
½ t. salt
¼ cup melted butter
1 ¼ c. sugar
2 large eggs
2 large egg whites
1 cup grated raw pumpkin
1 cup toasted and chopped pecans
1 t. vanilla extract


Preheat the oven to 375. Combine the first three ingredients in a mixing bowl; set aside.

In a separate bowl, beat all remaining ingredients with a mixer until well-blended. Stir in the flour mixture until flour is fully incorporated and a moist dough is formed.


Lightly dust a countertop and your hands with flour. Divide the dough in half, shape each half into a log shape (about 11 x 1.5 inches). Place both logs on a cookie sheet lightly greased with butter and flatten them slightly. Bake for 25 minutes. When done, set aside to cool enough to handle.


Once logs are cool, transfer them to a cutting board and slice them crosswise into half-inch thick slides. Return the slices, cut side down, to the baking sheet. Bake for 10 minutes. Remove the baking sheets from the oven, turn the slices over, and bake for 10 more minutes or until they begin to turn golden-brown.

Let cool, serve dunked in hot coffee.


Roasted Garlic Focaccia

For dough starter:

2/3c. warm water
2.5t. active dry yeast
1c. flour

For dough:

2.5c. unbleached flour, plus extra for dusting
1 head roasted garlic
1/3c. water
1/3c. olive oil, plus extra to grease bowl and pan
1/3c. white wine
1t. salt

Olive oil, salt, and oregano for topping
Equipment: two large mixing bowls, cookie sheet lined w/ aluminum foil, water-filled cake pan

First, make the dough starter. In a mixing bowl, combine 2/3c. warm water and the yeast. Cover with a dish towel and let this sit for 10 minutes or until the water looks murky and bubbly around the edges.

Next, add 1c. of the flour to the bowl. Stir until all the flour is incorporated into the water and a sticky dough forms. Again, cover with a dish towel and let this sit for 30 minutes. During this time, the dough should puff up a little. Use this time to remove the individual cloves from a head of roasted garlic – if the individual cloves are soft like a paste, set them aside. If any are still a little firm, chop them up a bit and set aside. Also, coat the inside of the clean mixing bowl with a splash of olive oil and set aside.

Now it’s time to make the dough. Add 2.5c. flour, prepared roasted garlic, 1/3c. water, olive oil, white wine, and salt to the mixing bowl containing the dough starter. Combine all until fully incorporated and dough is formed. Turn the dough out onto a clean countertop dusted with flour, and knead the dough for 8-10 minutes, dusting the countertop with more flour if the dough starts to stick.

Once the kneading is complete, put the ball of dough into the mixing bowl coated with olive oil. Cover with a dish towel and set aside to rise for approximately one hour, or until the dough has doubled in size. In the meantime, line the cookie sheet with aluminum foil and grease the foil with a splash of olive oil.

Once the dough has risen, turn it out onto the greased cookie sheet. Stretch the dough so that it covers the cookie sheet. Once the dough has stretched, use your fingertips to create “dimples” in the dough – the surface should not be even. Be careful not to poke holes in the dough – small craters will do the trick. Once you’ve dimpled the dough, cover it with the dish towel and let it rise for an additional 45 minutes. Use this time to preheat the oven to 425, placing a water-filled cake pan on the bottom rack of the oven (this creates steam inside the oven).

Once the dimpled dough has risen, remove the dish towel and brush your dough with a thin coat of olive oil, and sprinkle it with a few pinches each of salt and oregano. Now it is time to bake – place the cookie sheet on the middle rack of the oven, above the water pan. Lower the oven temperature to 400, close the oven, and bake for 25-30 minutes.

Remove the focaccia from the oven. Once it is cool enough to handle safely, slice it up and serve.
 

Sunday, October 17, 2010

Coffee and Cookies


I love coffee. No, I need coffee. I have an intervention-worthy dependence on the stuff. If, for some reason, I die under suspicious circumstances and an autopsy is performed, the medical examiner will find espresso in my veins. But unlike a drug addict floating inches above rock bottom, I actually enjoy my addiction. I’m not going to bother with the, “I can quit anytime I want,” schpiel, because I neither can, nor want, to give up my coffee. I’m not in it for the caffeine; I drink decaf late in the day simply because I love the flavor. The first sip of a perfectly brewed cup of Italian roast does for me what a blanket and a pacifier do for a screaming baby.

That being said, I’ve never really strayed from my small group of favorite brands and roasts. Like my past insistence on drinking only Italian wine, my coffee philosophy has been, “If it ain’t broke, don’t fix it.” French or Italian roast, Starbucks or Equal Exchange Fair Trade, sometimes sweetened, sometimes not, sometimes adding cream, sometimes drinking it black, but always grinding my own beans and making it stronger than most humans would find necessary or even palatable; the first thing I do in the morning is start my pot of coffee. I grind my beans and add water to the machine the night before, turn it on in the morning and let it brew while I shower, and then I enjoy a cup or two while I make myself presentable to the corporate world.


I recently discovered via Yelp that Boston’s North End is home to a shop called Polcari's Coffee that sells over a dozen varieties of coffee, roasts its own beans, and is conveniently located next to Mercato del Mare, my fish market (which, by the way, now sells incredible sushi). Walking into the store, I felt like a kid in a candy store - large glass jars and barrels filled with coffee beans lined the back wall of the shop, and the service counter was complete with a gilt old-fashioned scale that looked like it was plucked from the market where Vito Corleone worked in the early scenes of Godfather II. Polcari's also sell teas, spices, grains, legumes, and flours, including the chestnut flour I needed to bake a batch of Chestnut and Raisin cookies (featured in November’s issue of La Cucina Italiana and written below). I chose the Espresso Blend and the House Blend, and then asked for a recommendation, explaining that I favor dark roasts. The store clerk suggested Vienna Roast, and he packaged all of my beans in small bags - quarter pounds of each. I wanted to go home and try them right away, but I decided that brewing espressos and testing them after dark would probably not make for the best night’s sleep, I decided to wait until today to test my new coffees. Polcari’s gets an A+ on customer service - I didn’t feel like they were selling me coffee, I felt like they were giving me presents.


Before getting on the train and heading back to my ’hood, I randomly walked into a small produce market on Parmenter Street after seeing some small pumpkins in the window. I needed a pumpkin to make my biscotti, but being two weeks away from Halloween, the only pumpkins I’ve seen are larger than basketballs and weigh more than I do - hardly a wise purchase when my recipe requires only 1 cup of pumpkin! I picked out my pumpkin and thanked the man in the store for having the only non-Barry Bonds-sized pumpkins in Boston, and then I got distracted - “Ooh! You guys have Italian eggplant?!?” He smiled. I quickly surveyed the rest of the tiny shop - “Oh nice, oil-cured olives!” “Fresh borlotti beans? Wow!” “Ohhh, look at all the peppers!” “Sweet, fresh ravioli!” The way my eyes widened at the sight of his gorgeous produce must have led him to believe I hadn’t eaten for a month, and finally, I said, “Wait a minute, what store is this?” after realizing that I’d walked in without even looking at their sign. “Alba Produce,” he replied. Well, Alba Produce, you’ve got a fan in me. Those shiny amethyst-colored eggplants are going to make a great caponata one of these days.


This morning, I busted out my Moka pot and tried each one of my coffee blends. For those who aren’t coffee fiends like yours truly, a Moka pot is a special kind of coffee pot used for brewing espresso on the stovetop. It produces great results without having to spend $1500 on one of those machines that does everything to your coffee except drink it.

The Vienna roast was very rich and deep flavored, and very straightforward - I couldn’t pick out a “hint” of anything except pure caffienated bliss. Their Espresso roast is my new go-to coffee - rich and deep, with the subtle flavor of bitter dark chocolate, and an earthy flavor that reminded me of the smell of the ground after it rains. The House Blend was very similar to the Espresso roast (makes sense, since the Espresso roast beans make up a portion of the blend), but without the complexity. Earlier I stated that Polcari’s gets an A+ for customer service, but that Espresso roast is so fabulous that they could have called me dumb and ugly, given me the finger, and insulted my cooking and my mother, and I’d still go back to buy the Espresso roast.

Below are two recipes for cookies that pair extremely well with hot coffee, and because I can’t write about coffee without including an “I like my coffee like I like my men“ joke, I‘ve included recipes for my two favorite coffee drinks - tall, hot, and Irish or Italian!


Irish Coffee

1 large cup hot coffee
1 shot espresso
1 oz. Irish whiskey
¼ cup whipped cream (best if you use heavy cream and whip it yourself with a whisk or an immersion blender

Combine the coffee, espresso, and whiskey in your favorite tall coffee mug. Top with whipped cream and serve very hot.


Caffe Corretto

“Corretto” means corrected in Italian - literally, the translation is “corrected coffee.” Your brew is corrected with a shot of liquor, most likely grappa, sambuca, or amaretto. I prefer sambuca.

Follow the above recipe for Irish coffee, substituting sambuc
a for the whiskey and omitting the whipped cream.


Pumpkin Pecan Biscotti

3 ½ c. unbleached all-purpose flour
2 ½ t. baking powder
½ t. salt
¼ cup melted butter
1 ¼ c. sugar
2 large eggs
2 large egg whites
1 cup grated raw pumpkin
1 cup toasted and chopped pecans
1 t. vanilla extract

Preheat the oven to 375. Combine the first three ingredients in a mixing bowl; set aside.

In a separate bowl, beat all remaining ingredients with a mixer until well-blended. Stir in the flour mixture until flour is fully incorporated and a moist dough is formed.
Lightly dust a countertop and your hands with flour. Divide the dough in half, shape each half into a log shape (about 11 x 1.5 inches). Place both logs on a cookie sheet lightly greased with butter and flatten them slightly. Bake for 25 minutes. When done, set aside to cool enough to handle.


Once logs are cool, transfer them to a cutting board and slice them crosswise into half-inch thick slides. Return the slices, cut side down, to the baking sheet. Bake for 10 minutes. Remove the baking sheets from the oven, turn the slices over, and bake for 10 more minutes or until they begin to turn golden-brown.

Let cool, serve dunked in hot coffee.


Chestnut and Raisin Cookies with Pignoli

9 T. butter, softened
¾ c. sugar
Pinch salt
1 egg
1 cup unbleached all-purpose flour
2/3 c. chestnut flour
½ c. pignoli
¼ c. raisins

Preheat oven to 350.

In a large bowl, mix butter, sugar, and salt, then mix in egg. Next, add the all-porpose flour, chestnut flour, pignoli, and raisins. Mix with your hands until blended.

Lightly flour your hands, then roll the dough into balls about 1 ½ inches in diameter. Place them about an inch apart on a greased baking sheet, and press each into a 2 ½ inch round.

Bake for 8-10 minutes, then rotate pan and bake 8-10 more minutes, or until the edges of the cookies turn golden. Then, transfer cookies to a wire rack to cool, and serve dunked in hot coffee. 

Tuesday, October 12, 2010

Spiced & Spiked Shortbread

It’s been quite some time since I’ve cooked anything with Scottish flair, so last night I decided to bake a batch of shortbread cookies.  Quick, easy, and inexpensive, these cookies are buttery and rich without being ridiculously sweet.  I cannot begin to explain why, but these cookies truly taste best when you eat them on a rainy or snowy day while curled up under a blanket and sipping a cup of Earl Grey tea!

Spiced & Spiked Shortbread

8 oz. butter, softened at room temperature
2 cups unbleached all-purpose flour
½ cup powdered sugar*
½ t. ground cardamom
¼ t. ground aniseseed
1 t. grated fresh ginger (you can substitute ½ t. ground ginger)
1 T. Scotch or Irish whiskey

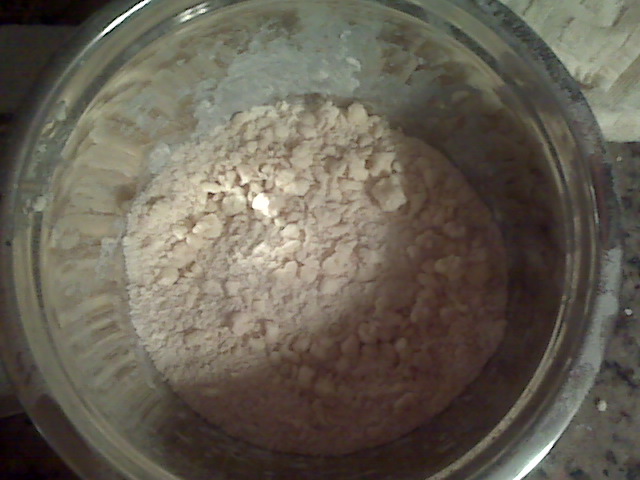
Preheat the oven to 350.  Combine all ingredients in a bowl (make sure to use a deep enough mixing bowl, otherwise your kitchen will end up looking like a scene from Scarface).  Using a mixer on low speed, beat until the butter has formed into tiny clumps and the ingredients have the consistency of moist sand. 

Pour mixture from bowl into a pie plate or a brownie pan.  Pat the mixture down (as shown) so that it is compressed, but not tightly packed.  It should be about a half-inch thick. 

Place in oven and bake for 30 minutes, or until the top begins to turn golden.  Next, remove from oven and let cool completely, then slice into desired shapes.

VARIATION:  Add ¼  c. chopped nuts or dried fruit to the butter/flour/sugar mixture. 


*  Commercial powdered sugar often contains cornstarch or other anti-caking agents which will affect the texture of the finished product.  This recipe turns out better if you make your own powdered sugar by placing ½ c. of regular white sugar in a blender or small coffee grinder and grinding until it reaches the consistency of commercial powdered sugar.

Tuesday, August 24, 2010

Black Pasta with Roasted Garlic & Orange Sauce, Focaccia, Roasted Red Pepper Bruschetta

I promised recipes, and while I may not always post them in a timely manner, I always keep my word!  Here are the recipes for this weekend's dishes:


Black Pasta with Roasted Garlic and Orange Sauce

I created this recipe a few years ago in an attempt to impress a guy. Since I’ve always heard that the way to a man’s heart is through his stomach and I knew that the object of my affection liked high-quality food, I wanted to show off a little and serve something ostentatious. I picked up a bag of black pasta from a local producer at the farmers’ market (this was before I knew where to find squid ink!), and I decided that a sauce based on orange and roasted garlic would look original and memorable. Unfortunately, while the pasta water was boiling, the guy texted me to tell me he wasn’t coming. At first I was devastated, but once I tasted the final product my pain was alleviated – more pasta for me!

1 navel orange
1 head roasted garlic
½ c. white wine
1/4c. chopped Italian parsley (plus extra sprigs for garnish)
Drizzle olive oil
Salt
Pepper
Chile flakes

Zest one orange using a zester (you can buy one for about $10 at any good kitchenware store). Divide the zest in half – one half goes into the sauce, the other is set aside for garnish. Peel the remaining skin and as much of the pith as possible from the orange, divide into segments, and slice each segment into half-inch chunks.

Remove the cloves from 1 head of roasted garlic and put them in the blender with the orange segments, half the orange zest, and the wine, parsley, and olive oil. Puree until liquefied, adding more wine and olive oil if necessary.

Transfer puree into a saucepan large enough to hold all cooked pasta, and cook over low heat until the sauce is hot

While you are making the sauce, cook a batch of black pasta. Once pasta is done, drain it, add it to the pan with the sauce, and toss until all pasta is coated. Season with salt, pepper, and chile flakes.


Divide equally among 4 shallow pasta bowls, garnishing each with a pinch of the remaining orange zest and a sprig of parsley.


Roasted Garlic Focaccia

This recipe is time-consuming, but not labor intensive - active prep lasts approximately 20 minutes; the rest of the time is spent waiting for the dough to rise.  This is a perfect recipe to make on a lazy Sunday during football season, as most of the active work can be done during commercial breaks if you measure your ingredients ahead of time!   

For dough starter:
2/3c. warm water
2.5t. active dry yeast
1c. flour

For dough:

2.5c. unbleached flour, plus extra for dusting
1 head roasted garlic
1/3c. water
1/3c. olive oil, plus extra to grease bowl and pan
1/3c. white wine
1t. salt

Olive oil, salt, and oregano for topping
Equipment: two large mixing bowls, cookie sheet lined w/ aluminum foil, water-filled cake pan

First, make the dough starter. In a mixing bowl, combine 2/3c. warm water and the yeast. Cover with a dish towel and let this sit for 10 minutes or until the water looks murky and bubbly around the edges.

Next, add 1c. of the flour to the bowl. Stir until all the flour is incorporated into the water and a sticky dough forms. Again, cover with a dish towel and let this sit for 30 minutes. During this time, the dough should puff up a little. Use this time to remove the individual cloves from a head of roasted garlic – if the individual cloves are soft like a paste, set them aside. If any are still a little firm, chop them up a bit and set aside. Also, coat the inside of the clean mixing bowl with a splash of olive oil and set aside.

Now it’s time to make the dough. Add 2.5c. flour, prepared roasted garlic, 1/3c. water, olive oil, white wine, and salt to the mixing bowl containing the dough starter. Combine all until fully incorporated and dough is formed. Turn the dough out onto a clean countertop dusted with flour, and knead the dough for 8-10 minutes, dusting the countertop with more flour if the dough starts to stick.

Once the kneading is complete, put the ball of dough into the mixing bowl coated with olive oil. Cover with a dish towel and set aside to rise for approximately one hour, or until the dough has doubled in size. In the meantime, line the cookie sheet with aluminum foil and grease the foil with a splash of olive oil.

Once the dough has risen, turn it out onto the greased cookie sheet. Stretch the dough so that it covers the cookie sheet. Once the dough has stretched, use your fingertips to create “dimples” in the dough – the surface should not be even. Be careful not to poke holes in the dough – small craters will do the trick. Once you’ve dimpled the dough, cover it with the dish towel and let it rise for an additional 45 minutes. Use this time to preheat the oven to 425, placing a water-filled cake pan on the bottom rack of the oven (this creates steam inside the oven).

Once the dimpled dough has risen, remove the dish towel and brush your dough with a thin coat of olive oil, and sprinkle it with a few pinches each of salt and oregano. Now it is time to bake – place the cookie sheet on the middle rack of the oven, above the water pan. Lower the oven temperature to 400, close the oven, and bake for 25-30 minutes.

Remove the focaccia from the oven. Once it is cool enough to handle safely, slice it up and serve it with Roasted Red Pepper Bruschetta, or with seasoned olive oil for dipping.

Variations –replace the head of roasted garlic with ¼ cup of one, or a combination, of the following: capers, slivered oil-packed sun-dried tomatoes, minced olives, gorgonzola crumbles, chopped fresh herbs, etc. The possibilities are endless.


Roasted Red Pepper Bruschetta

6 slices roasted red peppers
1/4lb. provolone, sliced thin
1 small clove garlic, sliced paper-thin
2T. olive oil
1T. white wine
1T. chopped parsley

Preheat the broiler. In a shallow baking dish, place the roasted peppers in one thin layer. Next, evenly sprinkle the garlic slices across the roasted peppers. Drizzle with the olive oil and the white wine. Now, layer the provolone across the top of the pepper and garlic layer, making sure all the peppers are covered.


Place under the broiler and broil until the cheese is melted and starting to brown at the edges. Remove from oven, sprinkle with parsley, let cool slightly, and serve pepper slices over focaccia bread.


I do hope you'll try these recipes!